

 Maintenance Connection Everywhere (MCe) · EAM/CMMS manuals
This document is intended for support staff, to walk you through. In 15 years, we have only a couple times needed to know how to do this. The instructions may change since it is up to Google to decide when/if to change them, but they were last checked on 2023.05.31 and worked at that time.
This document can be a little bit complicated. To help make sure you are trying to do things on the correct device, the text is color coded, and we've tried to color code it in a color deficiency (aka color blindness) friendly way.
See note below, Apple and Linux are very similar to Windows with the possible exception of troubleshooting with the USB connection part.
Warnings/Comments:
If your USB port on your phone/tablet is broken and you can only charge using QI, then this won't work.
Steps to follow:
1. how to put your Android in developer mode.
On your ANDROID device:
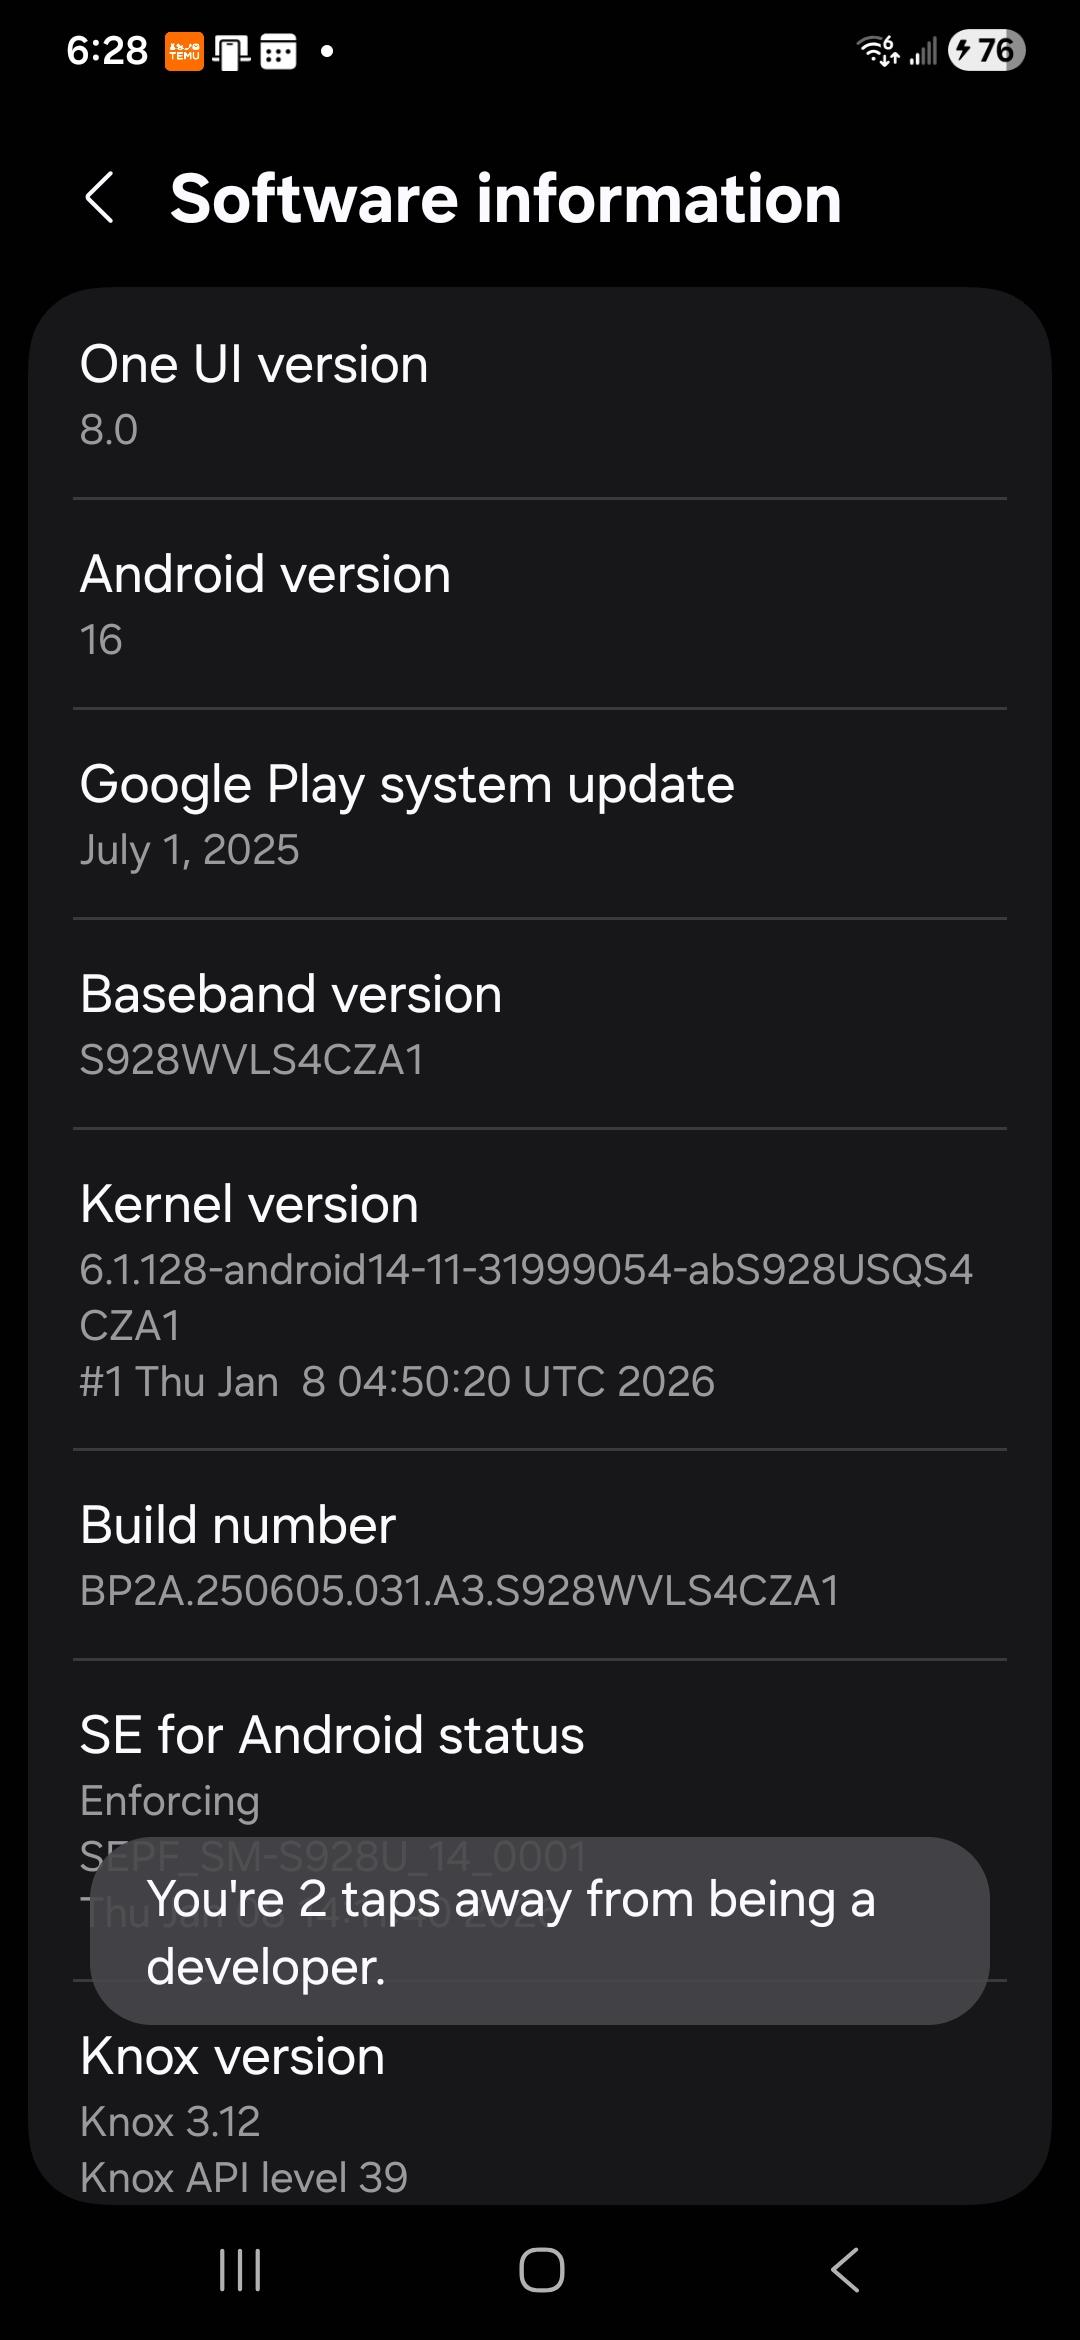
Find the 'Build number' option. Unfortunately, Google or the phone manufacturers are not consistent on where they put this, so here are some common places to find it:
| Device | How to find Build number |
|---|---|
| Google Pixel | Settings >> About phone >> Build number |
| Samsung Galaxy S8 and later, latest confirmation, S24 with One UI 8/Android 16 | Settings >> About phone >> Software information >> Build number |
| LG G6 and later | Settings >> About phone > Software info > Build number |
| HTC U11 and later | Settings >> About >> Software information >> More >> Build number or Settings >> System >> About phone >> Software information >> More >> Build number |
| OnePlus 5T and later | Settings >> About phone >> Build number |
This build number has a hidden feature supposedly only known to developers, though only a developer would think this is a good way to do it! Tap the "Build Number" 7 times, at which point you should see a message "You are now a developer!" If only it were that easy - see below, if I tap just two more times, after all these years working with computers - since about 1974 - I will finally be a developer.
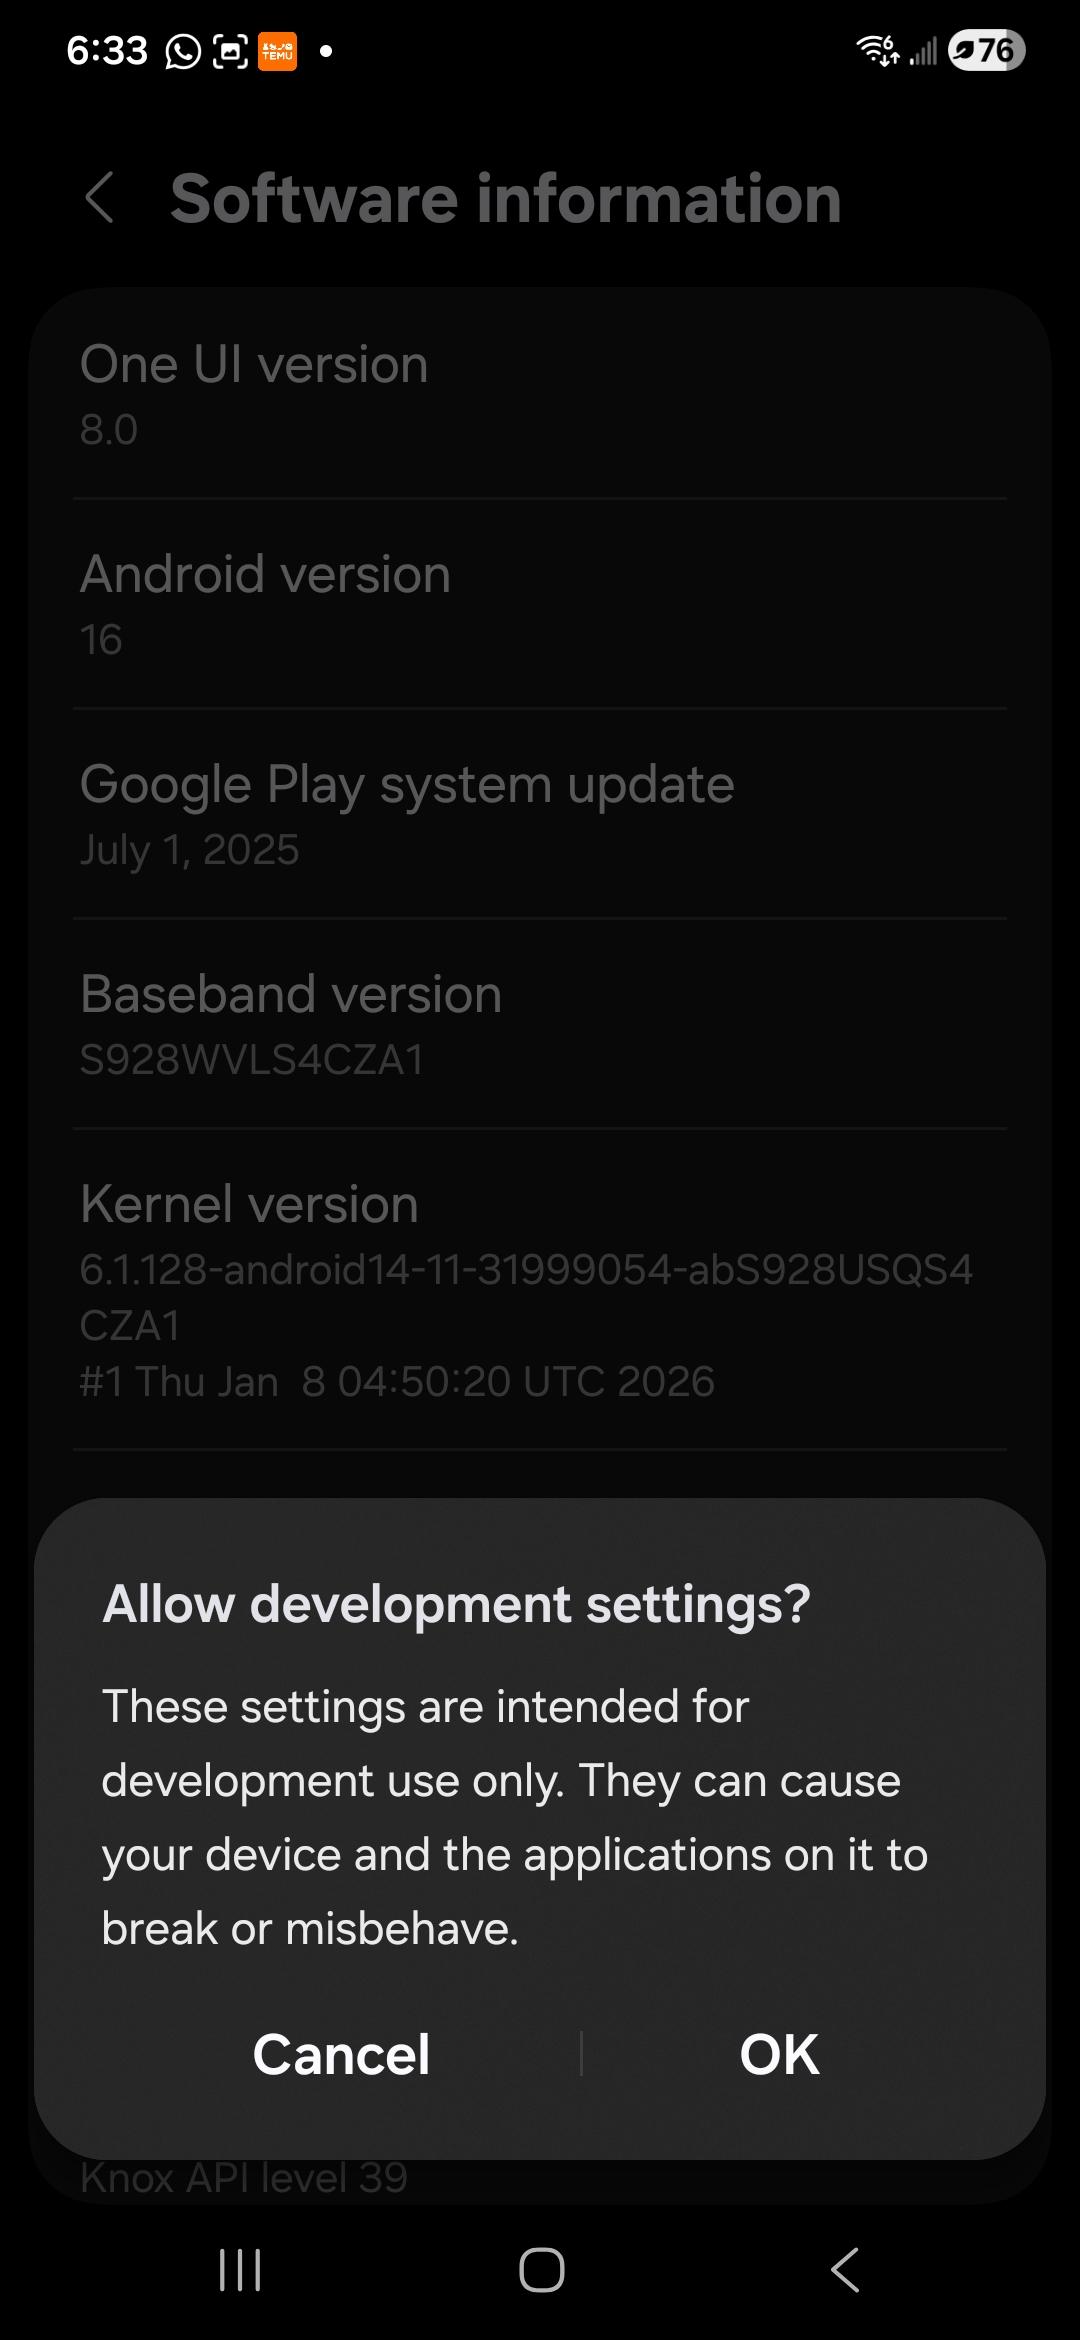
Anyway, snide comments aside, this enables the developer options on your device.
After you click on 'Build Number" 7 times, you may be asked to provide your identity information (password, fingerprint, pattern on dots etc.. However you log in) to verify that this isn't your child trying to add high power to your device when you aren't looking.
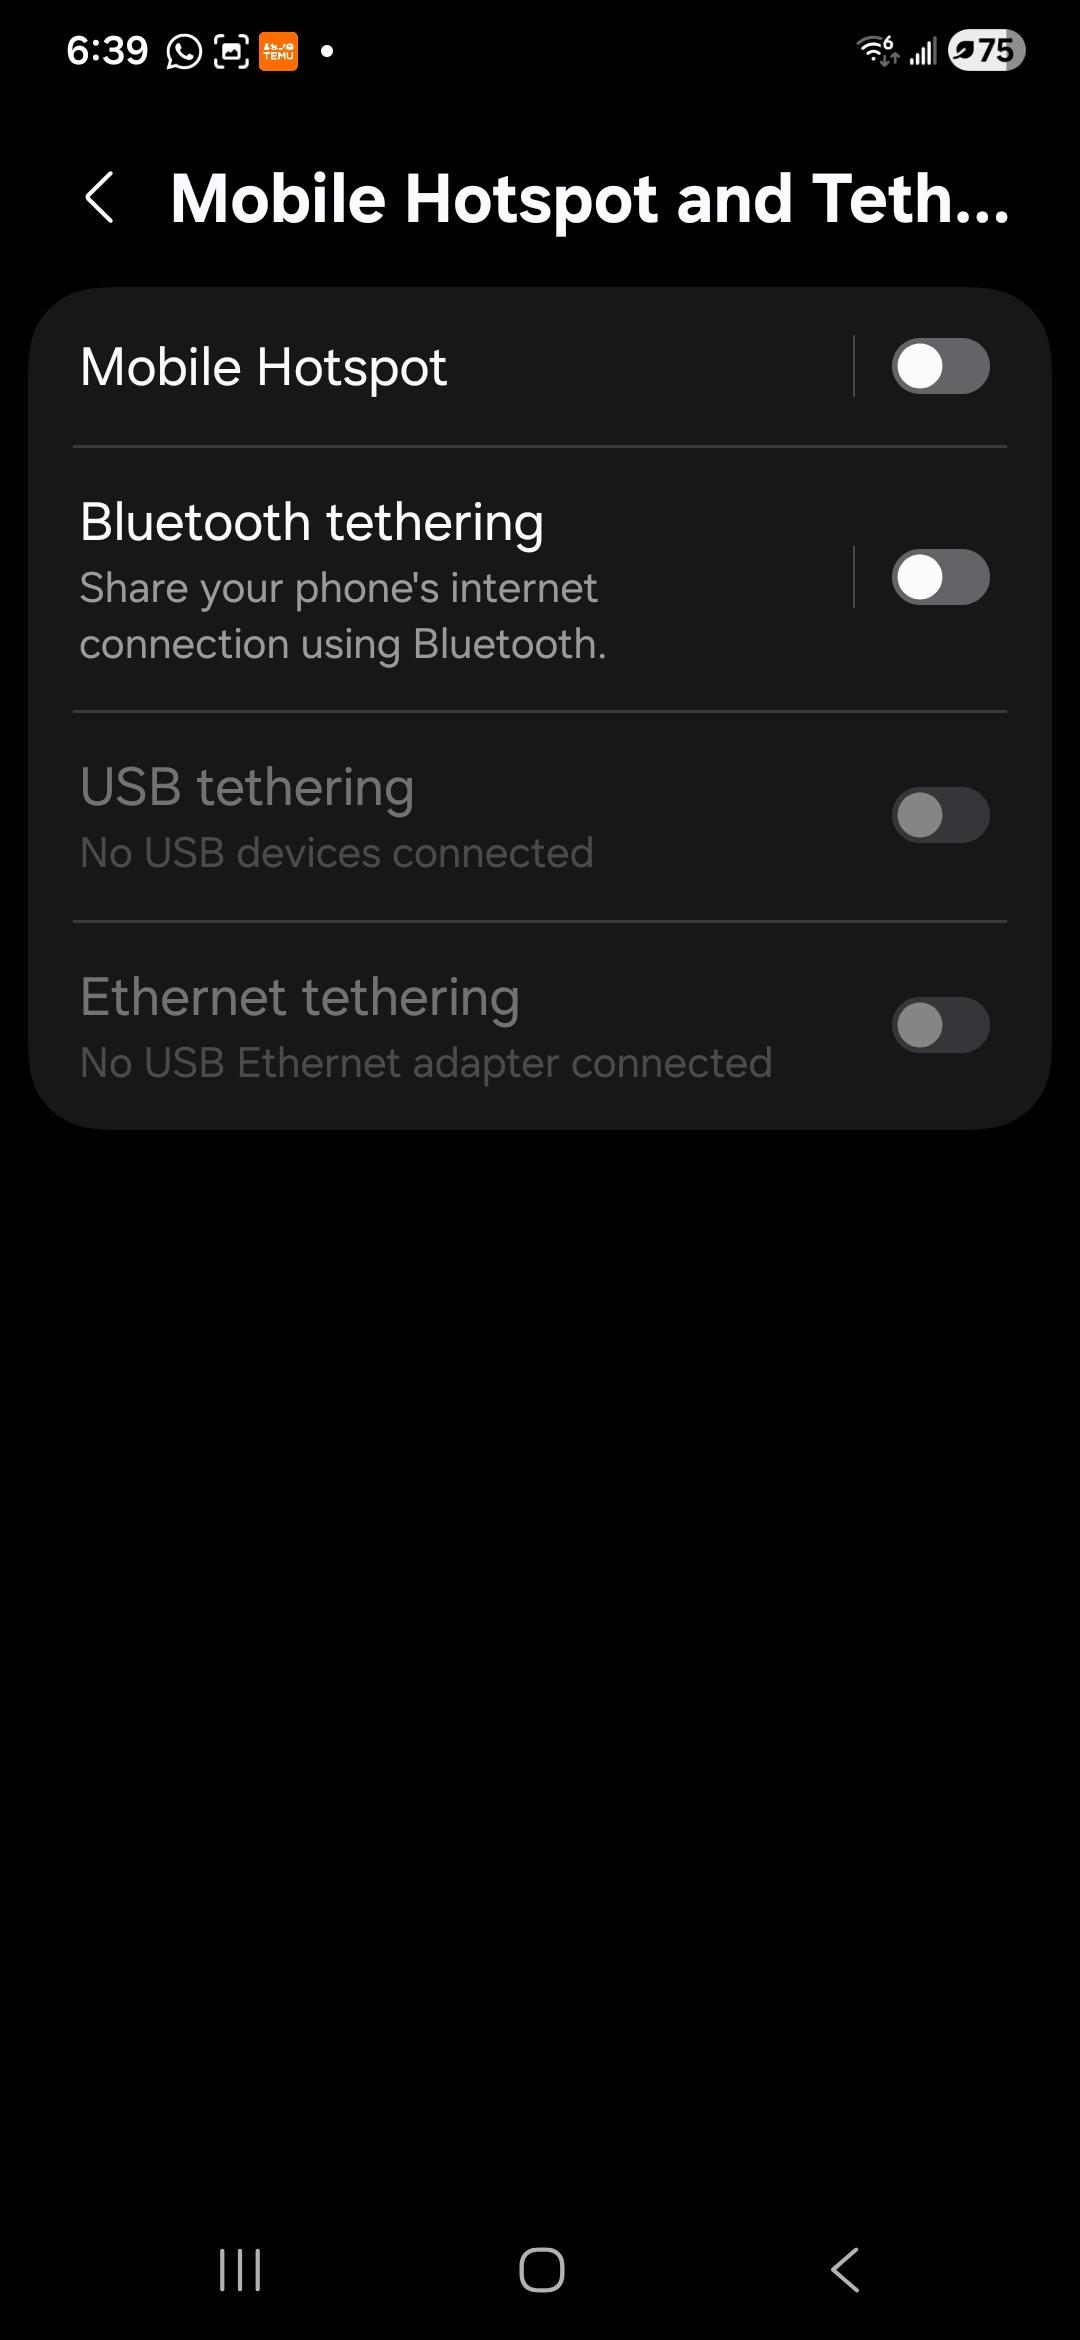
Go back one screen to find the Developer options at the bottom, then find the "USB debugging" option and turn it on.
Or go through this way:
Somewhere after Android 9, but still this way in Android 16 on Samsung S24, it became 'USB tethering' and other tethering options show up. It did not maintain search matches for 'usb debugging' - I guess they don't want casual users finding it.
Not sure when it changed, but Android
Android 9 (API level 28) and up, but not sure to what version, see directly above:
Settings >> System >> Advanced >> Developer Options >> USB debugging
Android 8.0.0 (API level 26) and Android 8.1.0 (API level 27):
Settings >> System >> Developer Options >> USB debugging
Android 7.1 (API level 25) and lower:
Settings >> Developer Options >> USB debugging
Other options for the 'non' developer to consider:
"Memory" – which will allow you to see some details on memory being used
"Stay Awake" which will let the screen stay on when the device is plugged in (but may wear out your screen sooner.)
2. How to connect your Android and Windows computer.
On your WINDOWS computer:
Open Chrome Browser
In the URL enter the following: (Recommend you copy/paste if possible)
chrome://inspect#devices
On the screen that appears, make sure "Discover USB devices" is checked (on)
Now physically connect the Android device to your windows computer using a USB cable. You should be able to use any port on your computer. Your phone/tablet likely only has one … the USB C if it is a modern phone, that you use to charge the device.
If this is the first time you've connected this phone/tablet, the device will show up listed as "Offline" and "Pending Authentication, please accept the debugging session on the device." (or words to that effect.)
On your ANDROID device:
Accept the request, it will likely be a popup message box of some sort on your Android device screen.
Troubleshooting these last two steps:
If you have a USB hub and the device isn't recognized, try going directly into a USB port on your Windows device.
If it still isn't recognized, make sure both your Windows device and Android device are on and are unlocked/logged in, your Android device is at its home screen, and the Windows device has the Chrome development tools screen as the selected window.
Try a different USB cable (Some USB cables only have the wires for power, not for data). To test this, you should be able to see files on your Android device from your Windows computer, if you can, then the USB cable should be ok for debugging.
If your Android's USB mode is not "PTP" (Picture Transfer Protocol) – you need to set it to PTP. (Settings >> Storage >> Menu >> USB computer connection". Note a few people on stack overflow say it only works for them in MTP so, if PTP doesn't work, you could try the others. But try 'hard' with PTP first because that is the setting that is defined as correct.
If none of these work … Your friends Bing, DuckDuckGo or other search engines will be your next attempt … and when you find out, let us know the details so we can update this document to help others.
Now in thechrome://inspect#devices window, you should see your device's name and serial number, on the next line you should see the version of Chrome your Android device is running.
3 Now you are ready for debugging.
For each Chrome tab you have open on your Android device (often only one) you will see one tab on your Windows device Chrome browser.
On the Windows Chrome, you will see an 'inspect' button beside the URL, you will normally have gone through all the rest of the work above so that you can click on that button to open the developer tools.
From here you are on your own! Hopefully you know why you did this and what you want to achieve.
WARNING!!! You can cause a LOT of damage in the dev tools that could take days for a real developer to figure out what you broke. Unless you really know what you are doing – make sure you are being guided by a senior level developer for anything you do here, or if you have written instructions, follow them exactly with no happy clicking or guessing – if unsure, ask the person who sent you the instructions.
If you are on a Zoom/Teams etc.., screen share situation – be slow and careful and just follow the exact instructions you are being given. Also be aware that you may be doing things both on your Android deviceas well as the Windows device in the dev tools – but often you are only letting the developer guiding you see ONE of those devices (or one at a time.) Don't do things on the one they can't see without asking or being told very precisely.
Most of the instructions above will work on any desktop computer, Windows, Apple or Linux. But since our high end development requires tools only available on Windows, we only do this testing and verifying with Windows. But if your laptop/desktop is Apple or Linux – the instructions should be the same, and if you are successfully using Linux, then you probably are 'geeky' enough to figure out any problems (likely around the USB connection since the rest is inside Chrome and Chrome is platform agnostic) to get it working on Linux.