Read the overview document first.
This document assumes that you have chosen to set up a 'polling' upgrade. We have a separate document that discusses the options and why you might choose 'polling' vrs the normally preferred 'listening'.
This is a work in progress, we are looking at automating it more. If you use this document and had points of confusion, please let us know so we can improve it for next time.
Setting up the Client machine
Step 1: Download msi installer.
Download tentacle msi installer from https://octopus.com/downloads/latest/WindowsX64/OctopusTentacle
Step 2: Install Octopus tentacle manager.
Install the tentacle and open tentacle manager (if it doesn't open automatically).
You may be then asked to accept the End User License Agreement, after checking the 'I accept' box, the 'next' will become available.
Your company policies will likely determine where you should install. A common default would be:
C:\Program Files\Octopus Deploy\Tentacle\
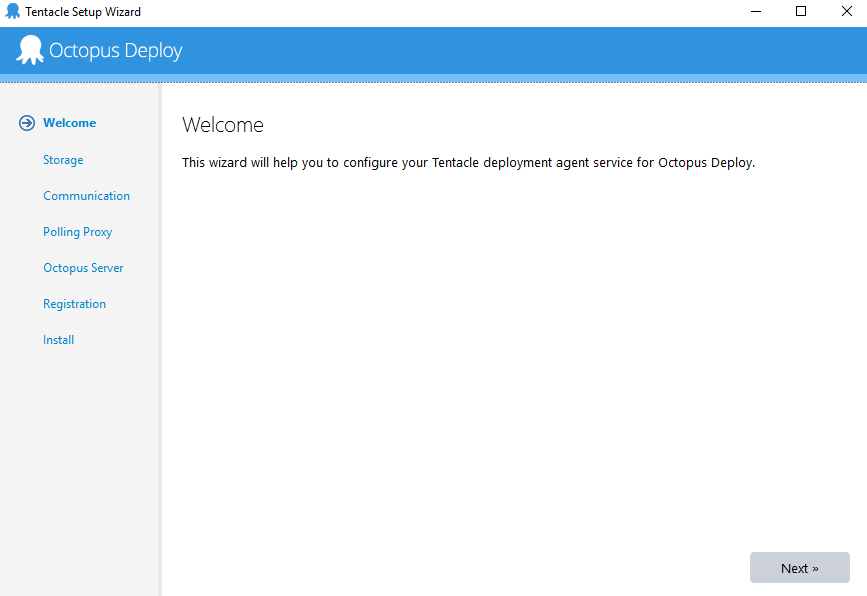
Step 3: Configure polling tentacle.
Press Next in Welcome screen.
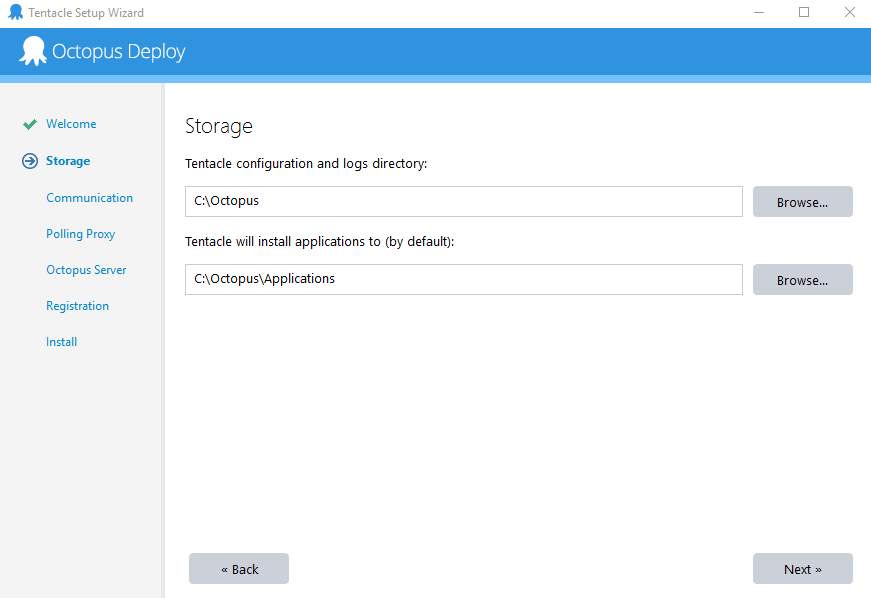
Step 4: Enter Storage and install directories.
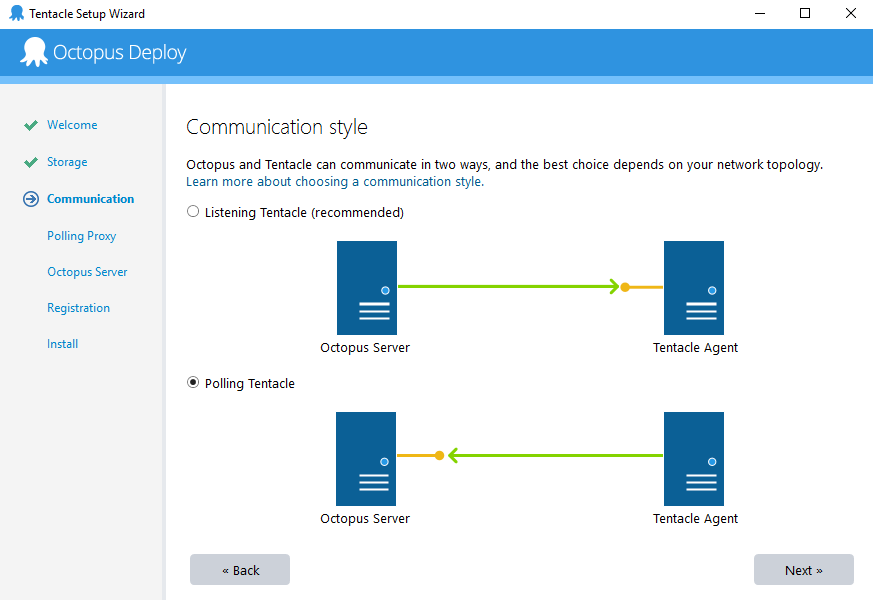
Step 5: Select Polling tentacle.
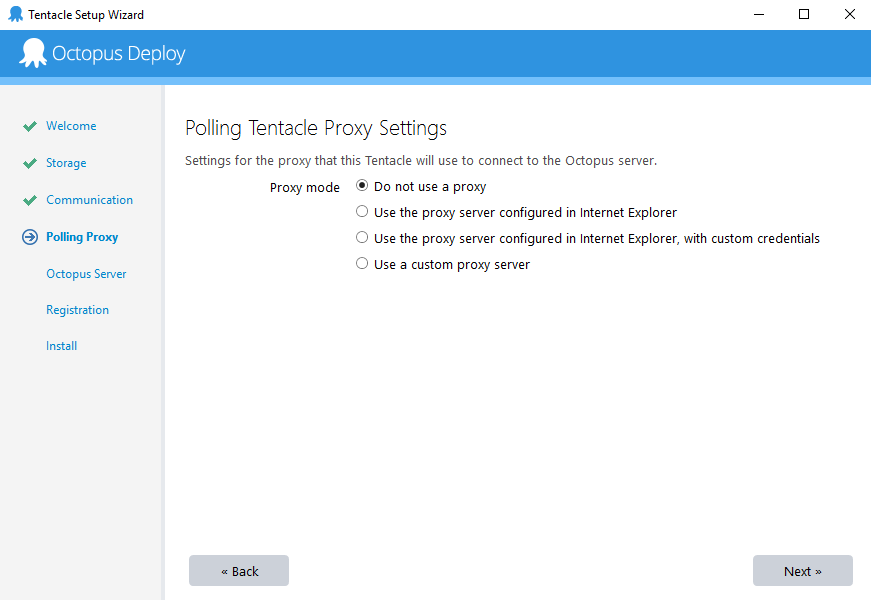
Step 6: Select Proxy mode.
"Do not use a proxy" is recommended if allowed in your environment. If not, "Use the proxy server configured in Internet Explorer" is normally recommended.
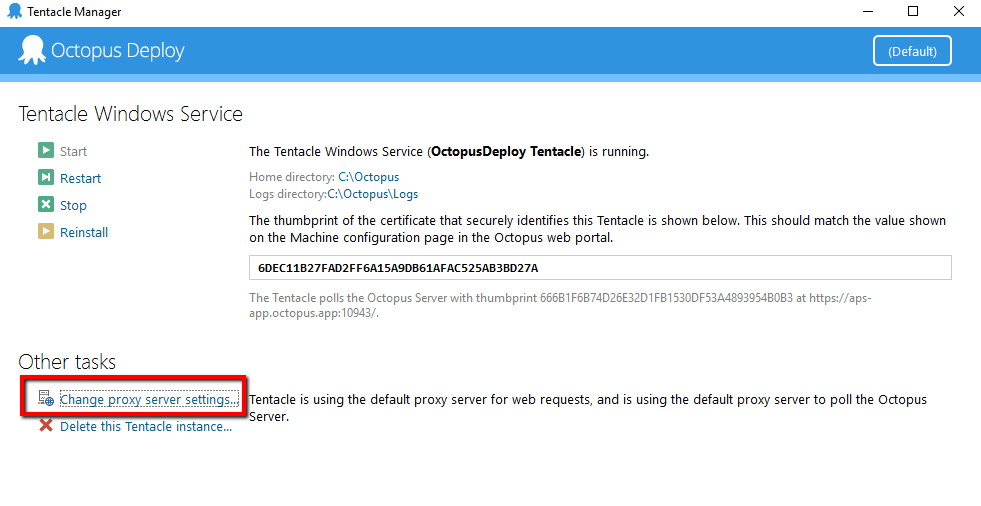
You can change the proxy server settings later in Octopus Tentacle Management. For more details see Annex A and Annex B.
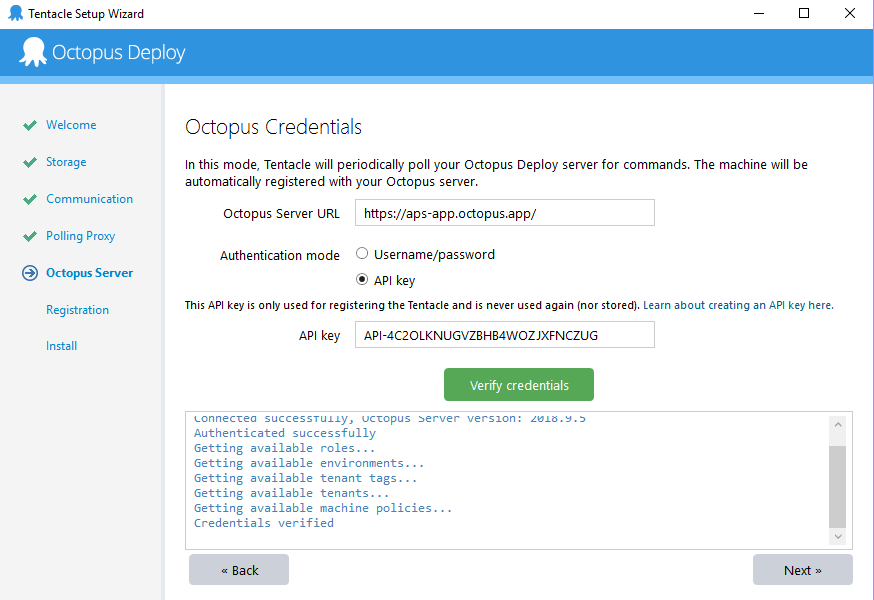
Step 7: Octopus Credentials.
Enter the Octopus Server URL and API Key as shown in below screen capture:
Octopus Server URL: https://aps-app.octopus.app/
API Key: API-4C2OLKNUGVZBHB4WOZJXFNCZUG
Verify credential and press Next.
Step 8: Register with your Octopus Server.
Enter Machine name, Environment, Roles, Tenants, Tenant Tags and press Next.
Machine name : <You server name or system name> Remember that we have a lot of companies we work with, so give it a name that will make sense to someone at our end. Your company name
Environment : Production
Note: These instructions are designed for customers that are running the produc in production. If you were to say Development or one of the other choice(s) you will end up asking for (and receiving) code that is not ready for production. We often push to dev code that is to test one thing while we know something else is temporarily broken. So you must choose 'Production'
Roles : Currently we support THESE roles, other roles you see listed may be for testing.
- web (Do not use MCe, that is for internal testing)
- LoginHub
- DataHub-Web
If you need more than one role, enter them with spaces in-between, e.g. "web LoginHub"
Tenants : <Provided by MCC, if it wasn't provided to you, ask before proceeding>
Your tenant will likely look something like this:
IBM-MCCON
Tenant Tags : <Provided by MCC, if it wasn't provided to you, ask before proceeding>
Your tenant Tags will look something like this: "Customer Type/MCUK".
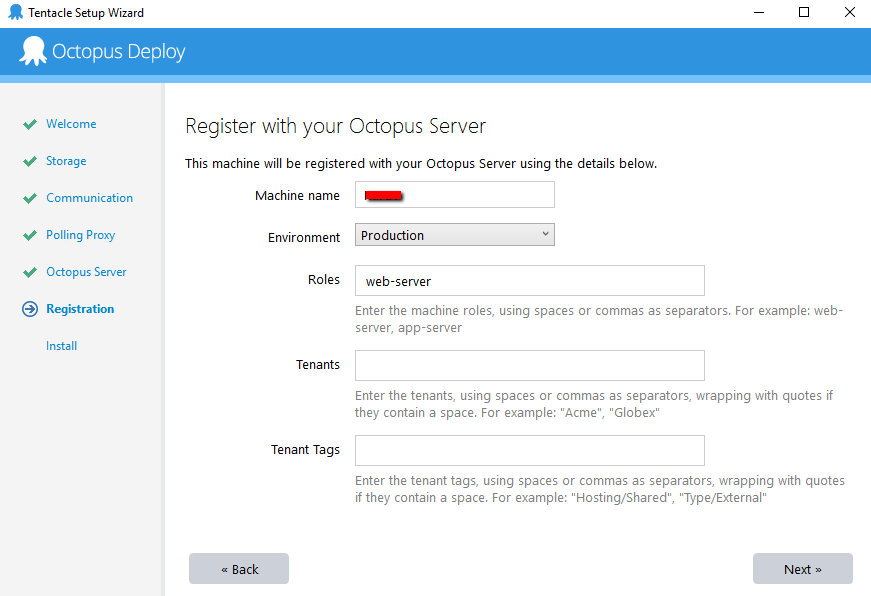
If you get an error that it 'Could not find the tenant named' … check with the instructions you were given, either you did not enter it in exactly as we provided it to you, or we did not give you the exact correct tenant name.
If you get an error like this one:
Error: ===============================================================================
Error: Could not find the tag named aTestBadTenantTag on the Octopus server. Ensure the tag exists and you have permission to access it.
Error: System.ArgumentException
…
Check with the instructions you were given, either you did not enter the tenant tag(s) in exactly as we provided it to you, or we did not give you the exact correct tenant tag(s)
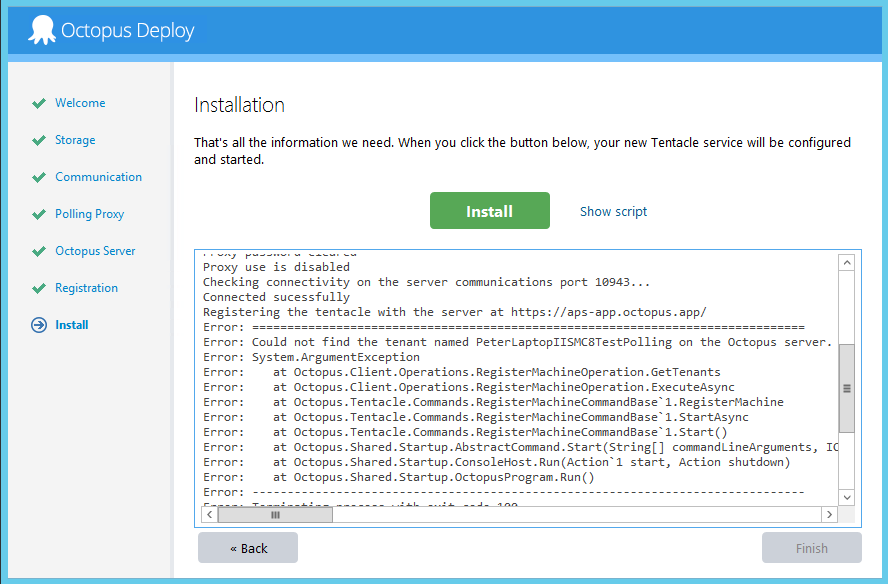
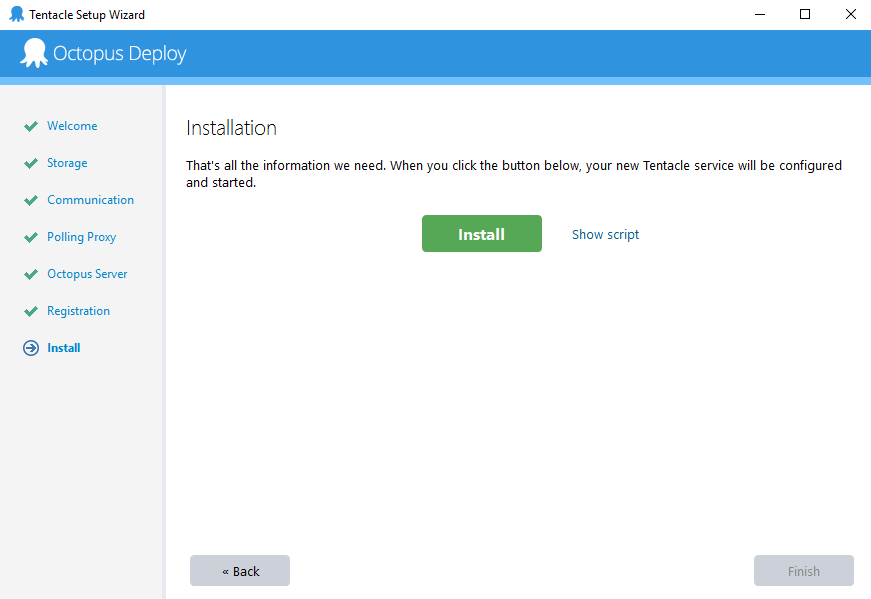
Step 9: Finally install the tentacle (Default instance).
You can also install named instance.
Settings from the octopus server
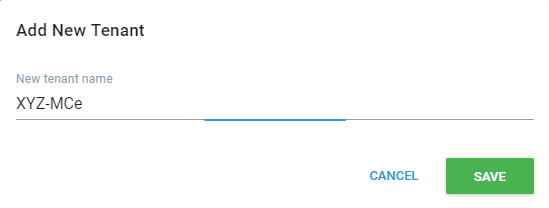
Step 1: Add tenant.
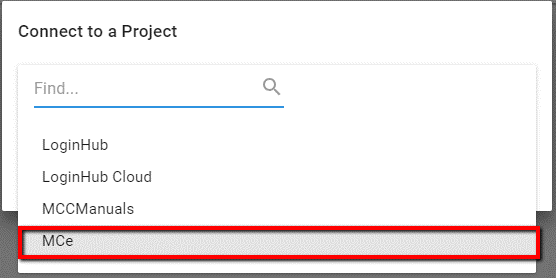
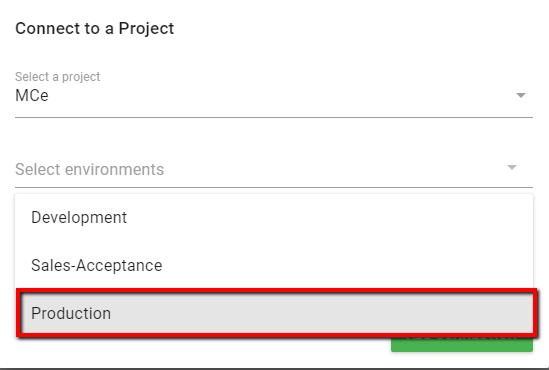
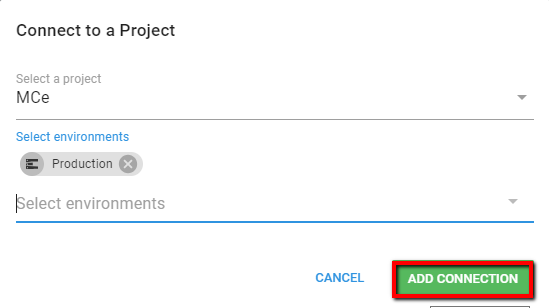
Step 2: Connect Project MCe.
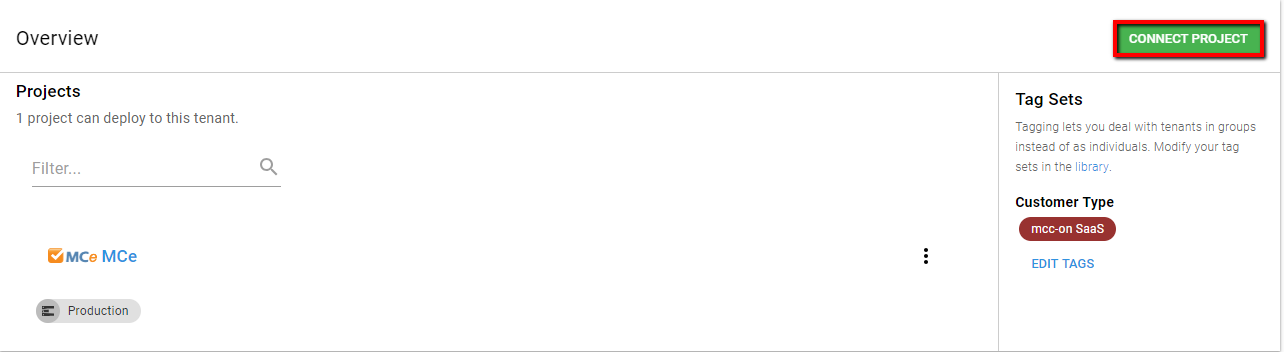
Select Environment to Production.
Add Connection.
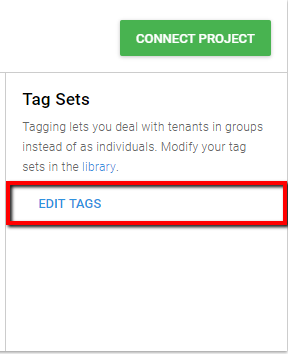
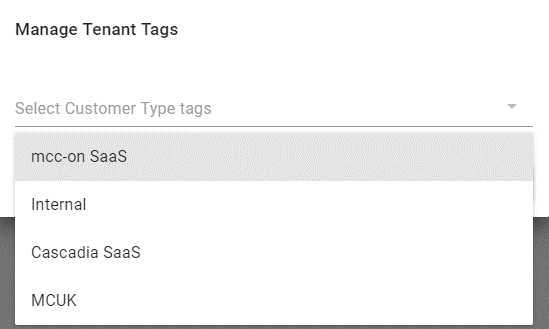
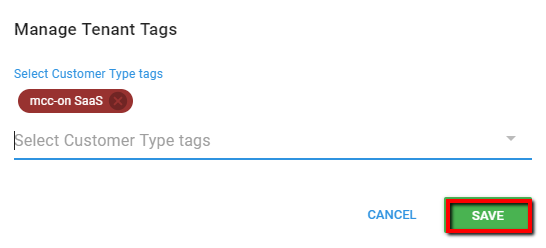
Step 3: Edit tags.
Select Customer Type tag, mcc-on SaaS
Save changes.
Step 4: Set Deployment target.
From Infrastructure >> Select Deployment Targets.
Add new deployment target or select any existing deployment target.
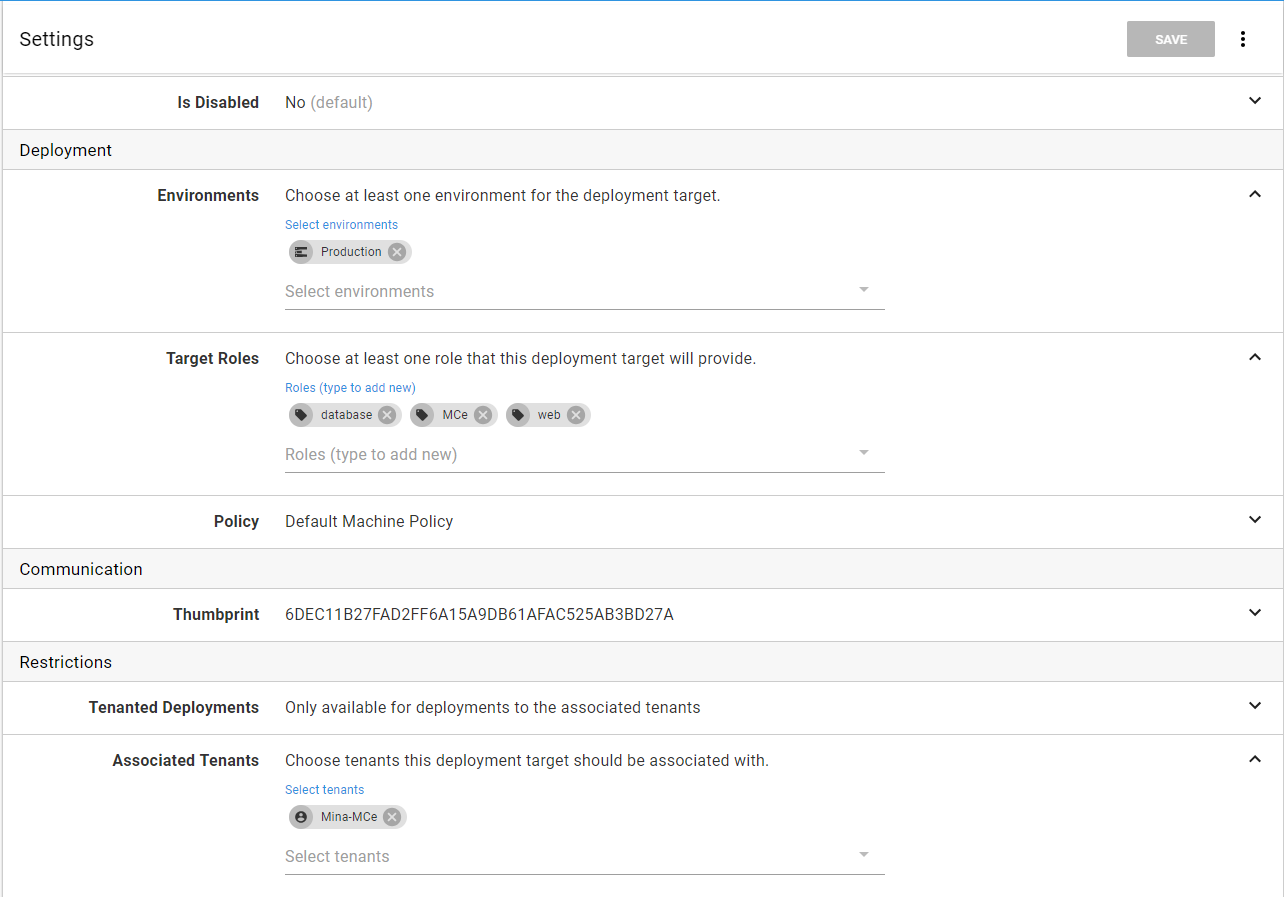
Then edit deployment target to add environment (Production) and Tenants.
To add deployment target:
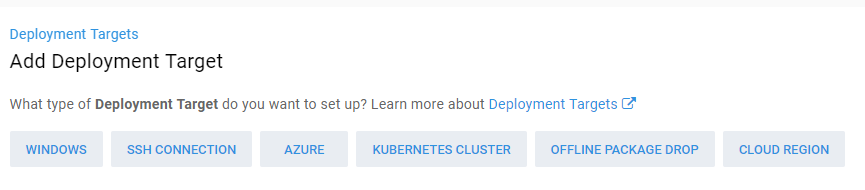
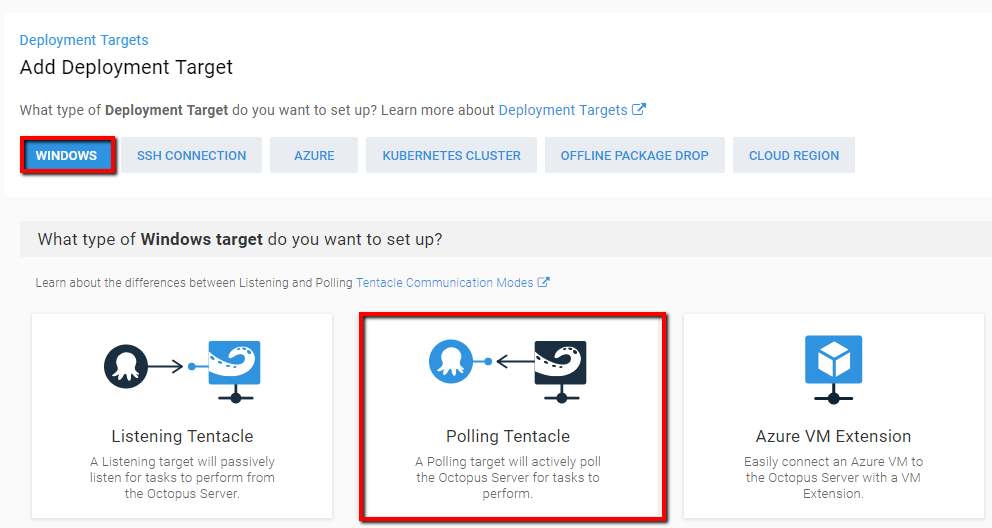
Select type windows target and then select polling tentacle.
Open settings of deployment target and set environment, roles and tenants for deployment.
Step 5: Deploy Project.
Select Project Mce. And go to Releases.
Select the release package to deploy.
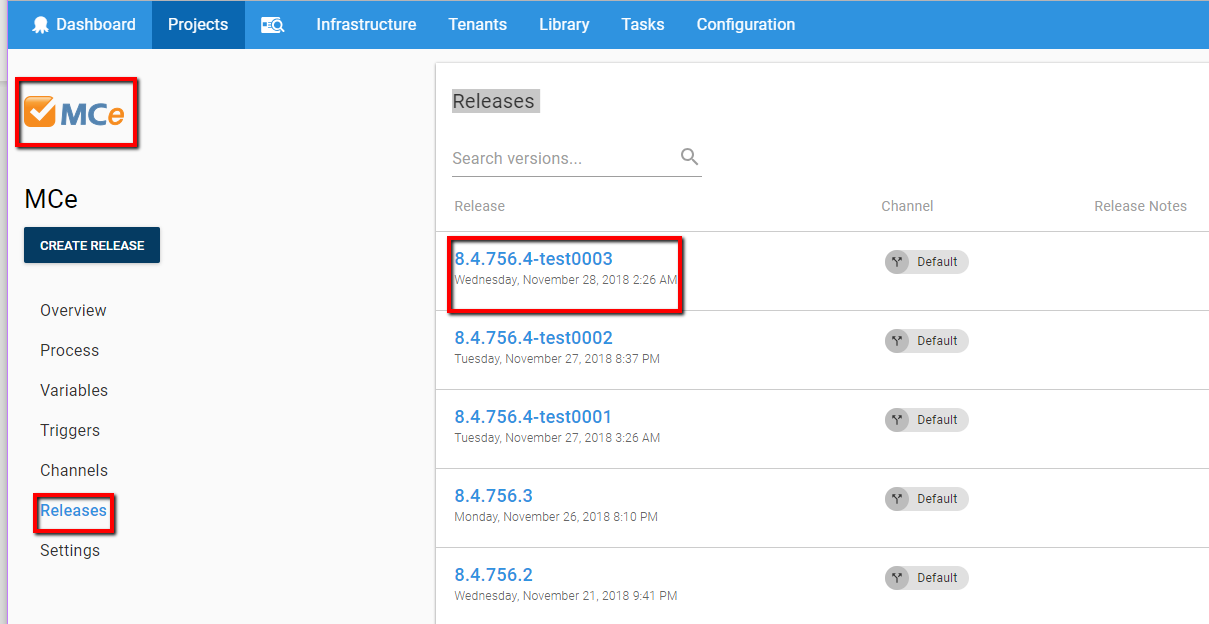
Press Deploy button at right-top corner and enter environment/tenant details to deploy the release.
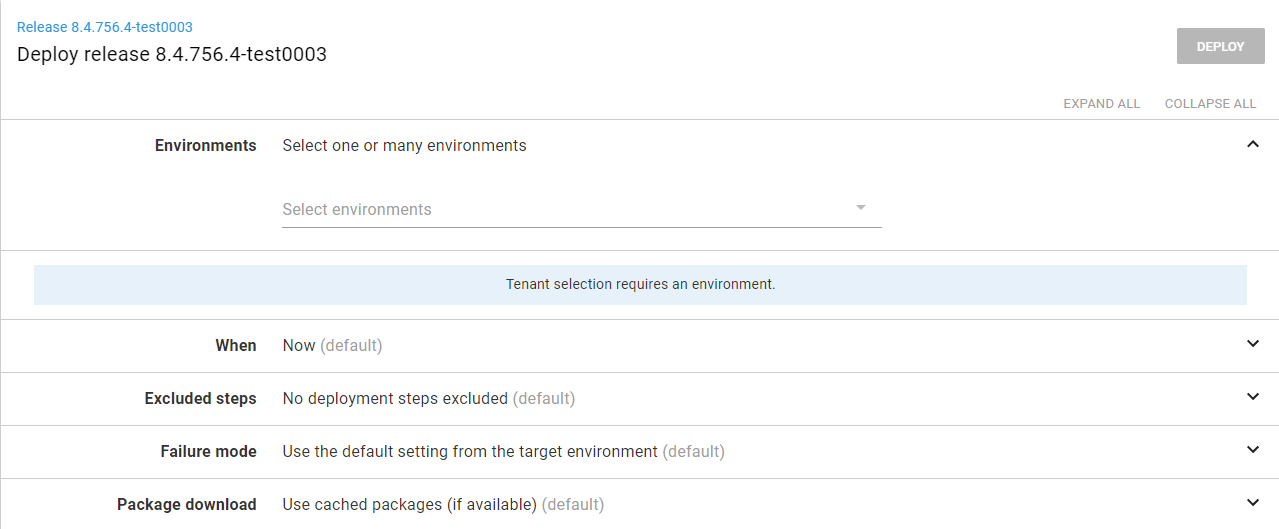
The deploy will take few minutes to deploy package and successful screen appears.
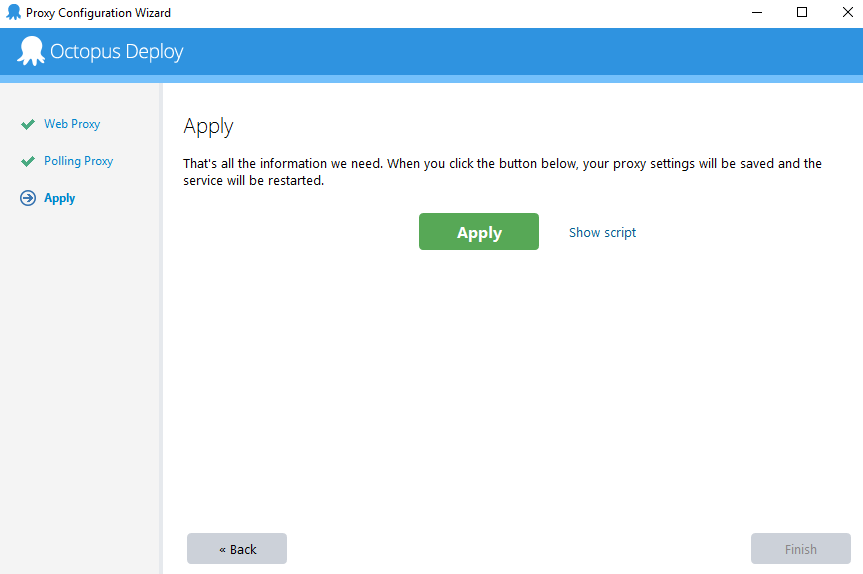
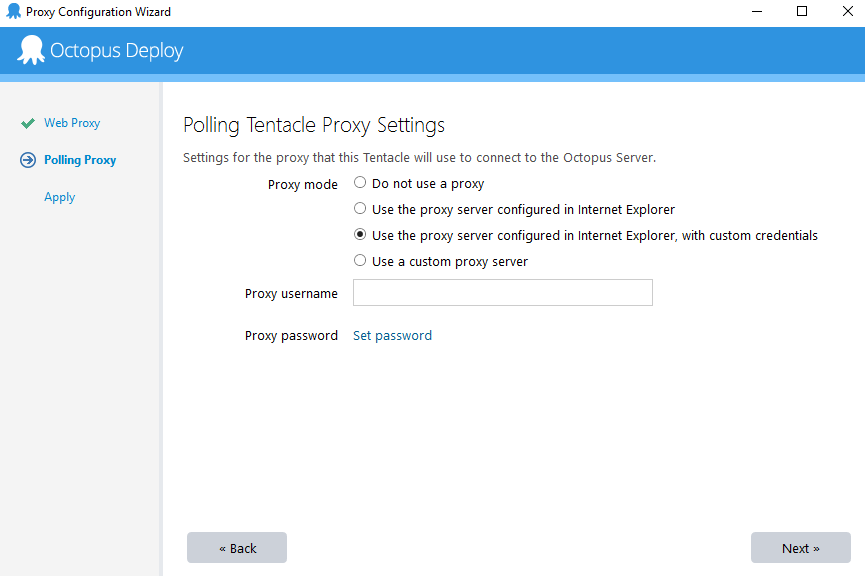
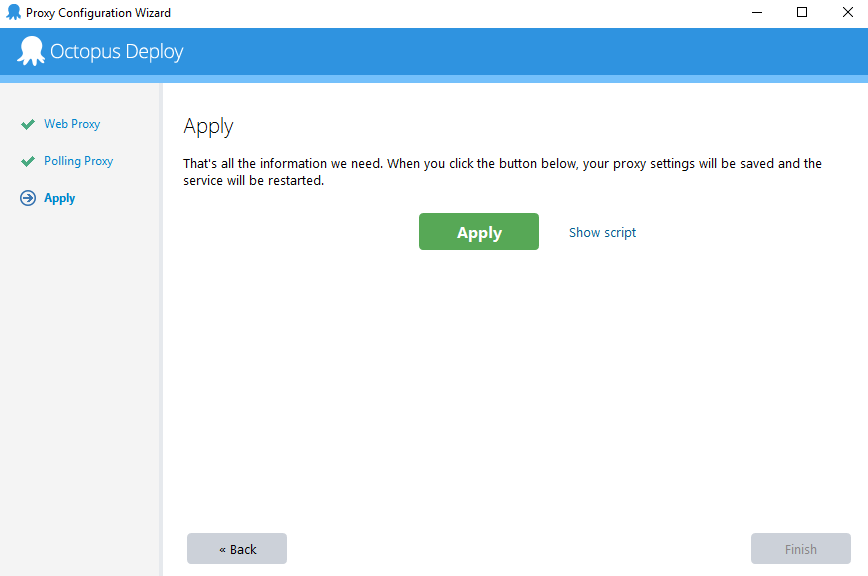
Annex A
Select Change Proxy Server Settings from the Octopus Tentacle Manager.
Step 1: Web Request Proxy Settings
You can use proxy server configured in IE with custom credentials. Enter Proxy user name and set password.
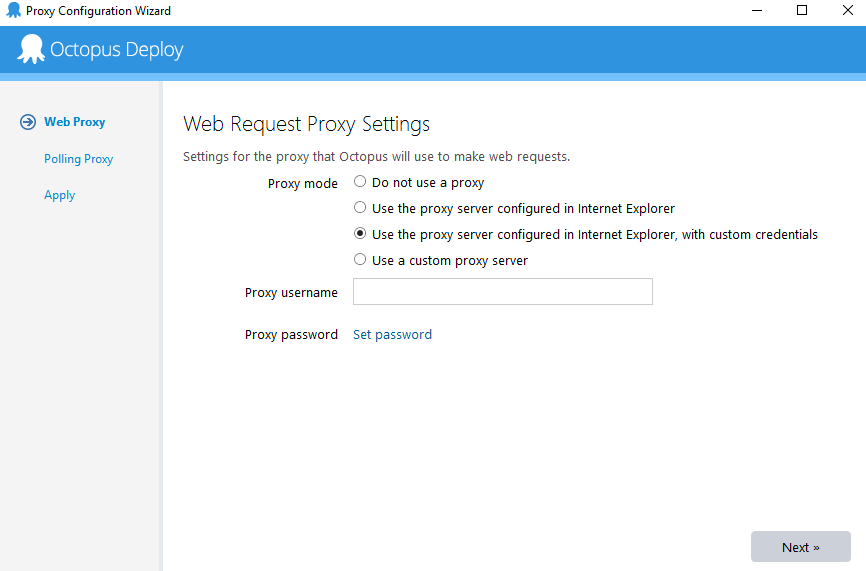
Then press next.
Step 2: Polling Tentacle Proxy Settings. You can use third option and enter username password. Then press Next.
Step 3: Then Apply and press Finish.
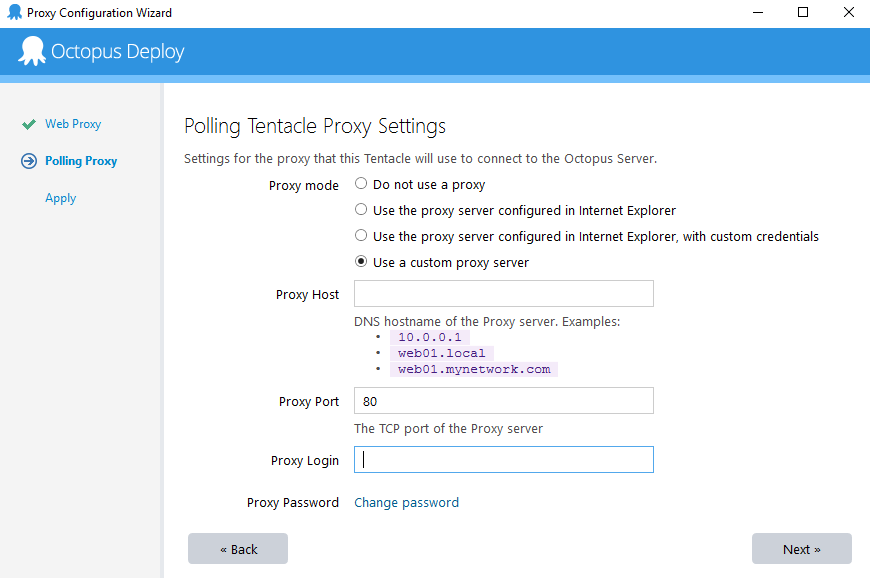
Annex B
Step 1: If you want to use a custom proxy server then select "Use a custom proxy server" option from the below screen.
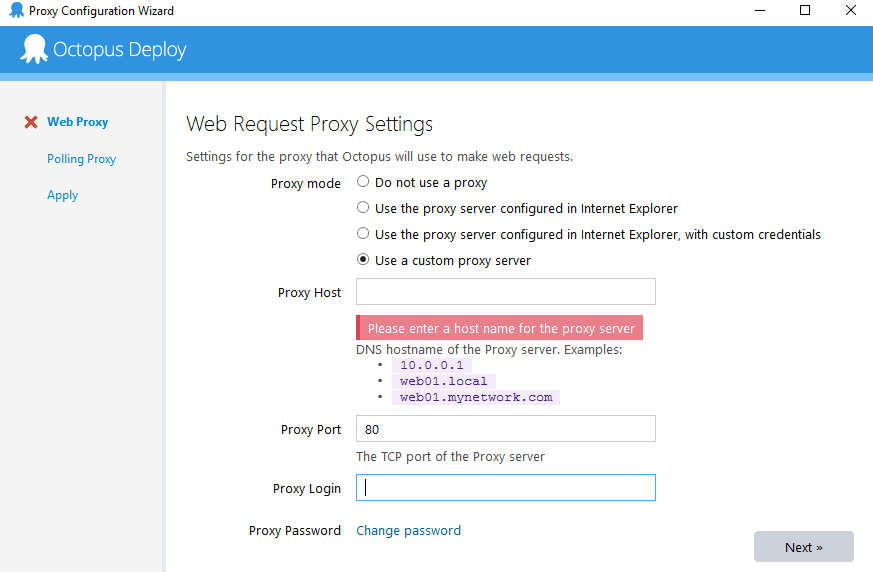
Provide Proxy Host, Proxy Port, Proxy Login and Proxy Password then press next.
Step 2: Polling tentacle proxy settings screen will be displayed. Select "Use a custom proxy server" option and provide Proxy Host, Proxy Port, Proxy Login and Proxy Password then press next.
Step 3: Press Apply and then Finish.