

 Maintenance Connection Everywhere (MCe) · EAM/CMMS manuals
Preamble
This is the setup process for a wide range of SAML 2.0 providers to work with the Maintenance Connection LoginHub and the Maintenance Connection family of products; Accruent and Maintenance Connection Canada. Once this is setup you will be able to login to MC Everywhere (MCe/MCxLE), MCExpress, MRO, Technician Workstation, the MRO report tool and MRO's Service Requester.
Please note that authentication & authorization is a complex process that includes lots of double checks and encryption, attention must be carefully paid to each part of the process since seemingly minor things can cause decryption failures or cause a security double check to not pass. These failures often require billable support time since they end up needing to tie up some of the most technically knowledgeable in order to diagnose very tiny settings differences that are hard to identify.
This is a case of taking an extra 15 minutes to do it slow and careful will usually save hours and dollars.
If you are using a provider that we give a 'specific' implementation for, you should use it. For example, if you use OKTA with SAML 2.0, you really should switch to use our OKTA SAML 2.0 provider and documentation. With our OKTA SAML 2.0 we automate some things for you and we take away features in SAML that OKTA doesn't support.
There are 2 types of screen shots, those from a provider and those from LoginHub. Note that YOUR provider will be different than our screen shots, but the screen shots may help you find it in your tool.
As you go through, if you find that your provider uses different terminology, and/or you can get us screen shots, we would be happy to update this documentation with that information. The benefit to you is that, when you come back in 6 months, it will be documented with 'your' provider's terminology and screen shots. The benefit to others is: it will be easier for them if they use your provider, or if they use another provider, just because they will see 2 or more samples of how other providers do it.
Setup Process
Start by logging into your administration software for your SAML provider.
Look for something that lets you add an application. For some providers this will be a 'txt' type file you edit, but for most, they will provide you with a GUI (Graphical User Interface,) likely web based.
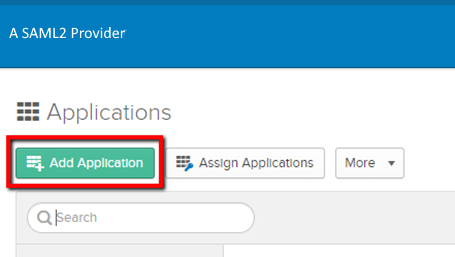
You will likely need to create an app for the Maintenance Connection LoginHub.
You will likely need to create an app for the Maintenance Connection LoginHub.
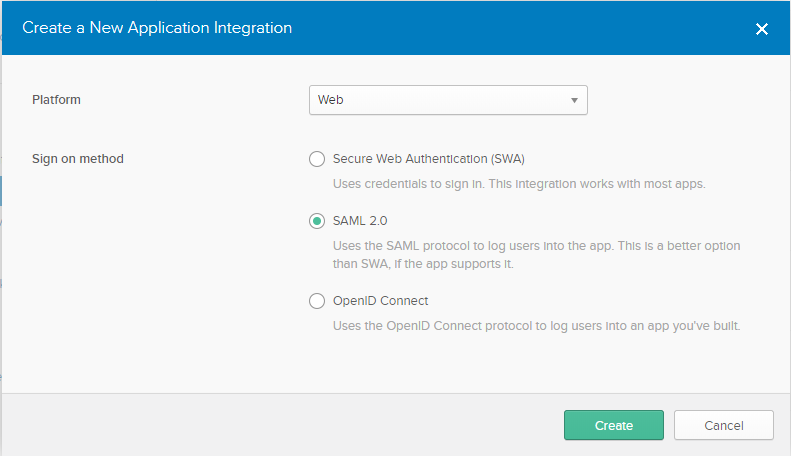
Note that if they give you other options and you want to use them, such as OpenID Connect, you will need a different LoginHub provider such as our OpenID connector or one of our specific ones.
SAML 2.0 Configuration
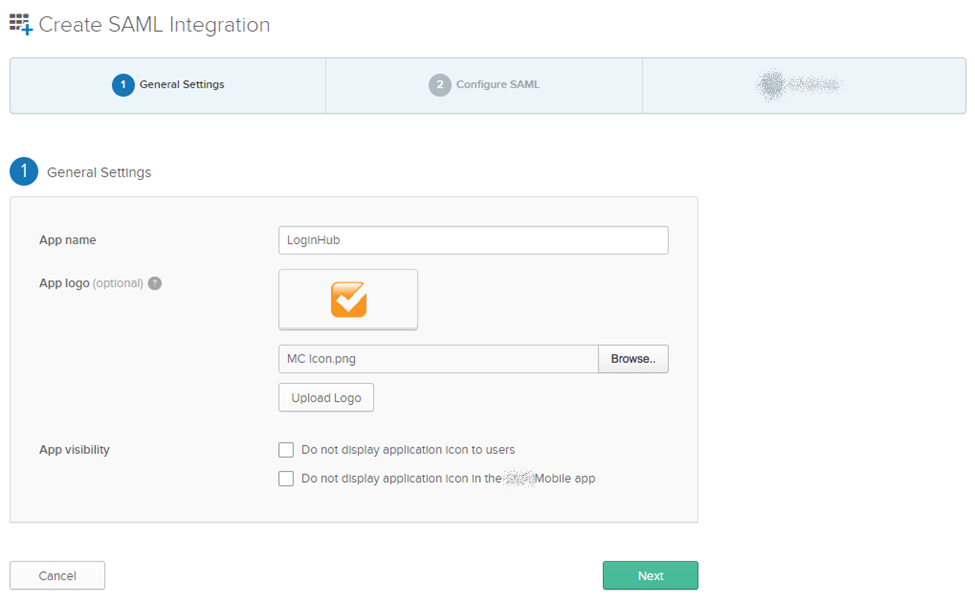
The App name can be anything you want, note your provider may name this differently (as in they may not use the label "App"..)
You will be able to login to MC Everywhere (MCe/MCxLE) modules, MCExpress, MRO, Technician Workstation, the MRO report tool and MRO's Service Requester.All of these are "one" app from your provider's perspective because Maintenance Connection LoginHub is the point of contact not MCe etc..,
We provide via email the App logo, but you can use anything you want obviously.
The app visibility settings are at your discretion. Your provider may have a larger or smaller set.
Your provider will have some place to put the following in. Cut and paste from this document to make sure there are no transcription errors.
Single Sign on URL:
https://one.loginhub.app/Saml2-Generic/Acs
Audience URI: Same value as above.
https://one.loginhub.app/Saml2-Generic/Acs
Looking at the Attribute Statements:
The id, givenName, surname, email and role are the attribute names we need to receive from your provider. Those listed above are the required attributes you must set your provider up to send to us. They must be spelled exactly as listed here, including capitalization. So givenName, not Givenname or GivenName
In our sample below, we chose to pass the role based on what you have set up as groups in your provider, and we chose to pass all the roles for our example, but sending ALL the roles is generally a BAD idea. Please see more info about roles below.
Your provider will have similar ways to get the info, but they may not match any of the formulas in the picture below. In the cases above, all the formulas are very simple, just specifying a field name, and there is a very good chance that YOUR provider will have fields that conceptually match, and many times that may be all you need. But in other cases you will need a more complex formula, for details or assistance, check your provider's documentation or talk to your provider's support personnel. Noting that the level of sophistication available is highly dependent on the provider you use. Some can go all the way up to very complex formulas which are essentially function calls (little programs), others have very little sophistication.
There are several other attributes that, if you allow your provider to send to us, we will pass them on to Maintenance Connection. The current complete list is:
- Id (This becomes the Unique Identity, it must be different for every user within the provider. If you give a Id we have not been given before, even if all the rest below are the same, a new user will be created.)
- role. Please see the discussion in the footnote if you are going to pass more than one role.1 We use Role in YOUR lookup table that you create in LoginHub, to look up the access group for this user.
- givenName
- middleName (optional)
- surname
- name (optional, otherwise we will build it from given, middle, sur)
- initials (optional, otherwise we will build it from given, middle, sur)
- homePhone (optional)
- workPhone (optional)
- mobilePhone (optional)
- pager (optional)
- fax (optional)
- repairCenterID (optional)
- craftID (optional)

Please note (details below) that the EXAMPLE in the screen shot of the role being ".*"is NOT a good example for most production deployments. Typically "mc.*" or something similar will be the proper value. The dot star value will return all the groups, and you really want to be limiting this to 1 or 2 or else you will exceed browser limits for cookie size and total cookies per domain.
The role can be passed in either or both of sets of attributes. In our sample we grab it from the provider groups as we feel most users will do it that way. Note that if the user can change the attribute … that would be a security issue that we recommend against. So normally, roles should come from the groups. But other times, your formula for figuring out what role a user should get may be much more complicated.
The roles you pass us must exactly match what you have setup in LoginHub.
You can list role multiple times to make your formulas easier, so you might have several rows all that have, on the left side, the attribute 'role'.
Setting Up For Login
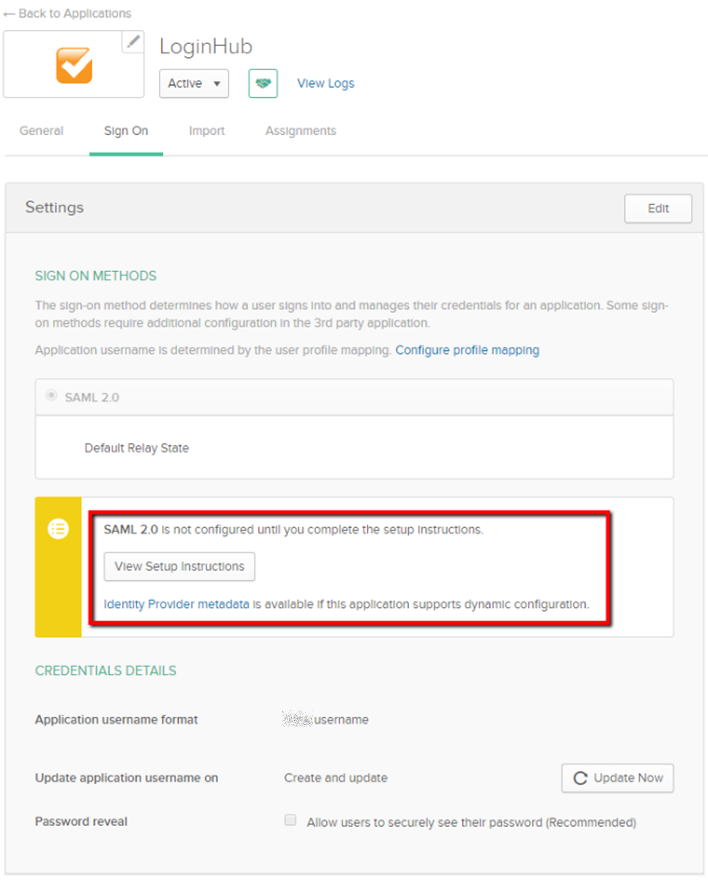
After your provider's side of the setup has been completed, data/settings must be collected in order to make login work in LoginHub.
SAML 2.0 Setting up LoginHub to be able to Login
To get a Login, high level you need:
- To be set up with your provider (everything above)
- To have appropriate LoginHub license(s) installed
- Set up the basic "what your user sees" settings
- Enter the values your provider gives you for us (Entity ID through Certificate)
- You can/should test at this point, to verify you have the basic login working
- Map what the info looks like in your provider to how you want it in MC
- You can now do detailed testing to ensure everything is set up the way you need it
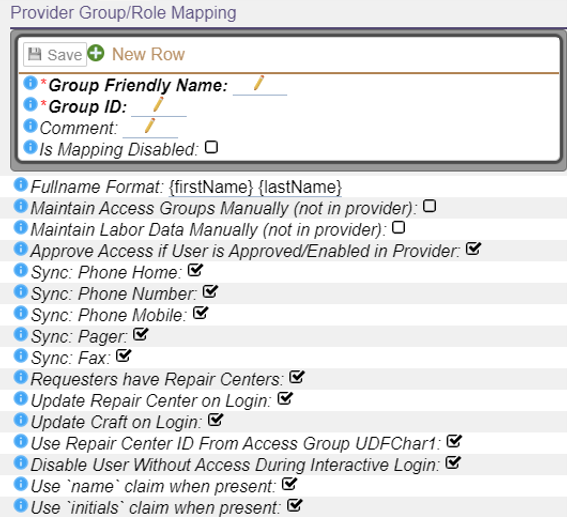
After the initial setup, the most common thing to come back for is to change the Group/Role mapping as you change things in MC and/or in your identity provider.
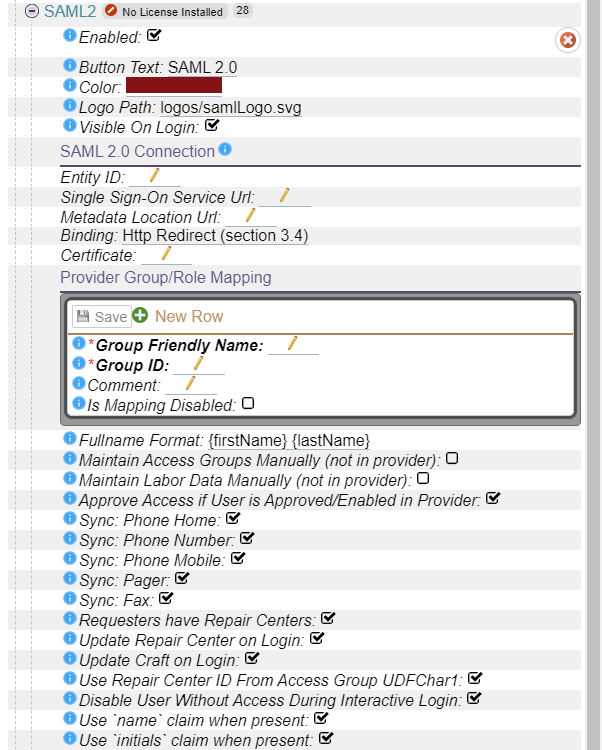
Overview: Here is what we will be filling out next.
License
You installer should provide you with a License, installing a license is not covered in this document.
When you have a license properly installed the "No licenses Installed" warning will go away.
First level setup:
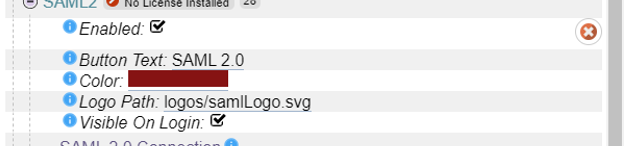
When you are ready to test or use, select "Enabled"
As in the screen shot above, by default the login button "Button Text" your users will see will say "SAML 2.0" and show the included Logo Path SAML Logo. Depending on how your users see it elsewhere in your system you may want to change that text to your provider, perhaps something like "Ping" or "ForgeRock" or "OneLogin" or you might use something entirely different. The key is, you want the Button Text and Logo to be something that means something to your users. The logo we provide is widely recognized as SAML 2.0, although it should be noted that there is no official SAML 2.0 logo, this is the one we created for your benefit.
The button color is within the range of the normal 'red' that is used by people when referring to SAML 2.0 and is the same color as our SAML logo.
The following fields come from your provider for LoginHub
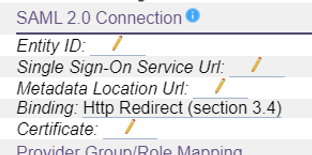
The Entity ID is, as defined by the SAML 2.0 documentation "The Entity Id of the identity provider". It can be one of the following:
- Email address
- X.509 subject name
- Windows domain qualified name
- Kerberos principal name
- Entity identifier
- Persistent identifier
Your provider may word it a little different, but you should be able to find it where they give you a summary of your setup and allow you to copy the certificate.
Identity provider Single Sign on Service URL will look something like the image below. This is purposely obfuscated; you need YOUR fully qualified (starts with HTTPS://) URL. It will be a URL that likely has something like "yourprovider.com" in it.is where the browser is redirected or where the post data is sent to when sending an AuthnRequest to the idp.
The MetaData Location URL must be a fully qualified URL, which means it will start with HTTPS:// It too likely will be provided wherever your provider gives you the certificate.
For the binding, you will be presented with a list of supported bindings. As of 2020.11 our SAML 2.0 provider supports section 3.4, 3.5 and 3.6. Pick whichever your provider supports.
Certificate: This will be an x.509 certificate that your provider will give you for providing us. You paste everything including the header and footer begin/end certificate lines. It will look something like the following:_
Mapping your provider's info to what you want in MC
The "shape" of the data in your identity provider is very unlikely to be the same as in MC. These settings let you map the data in the ID provider to the values stored in MC.
If you are thinking "Why can't MC have it the same as my provider" or "Why can't my provider just have it the same as MC" … the problem, if you want to call it a problem, is that every provider does things and keeps things a little bit different, and every package the let you log into keep data a little different.
With some software they will hard code it for a small number of providers and then force you to use the ID provider exactly the way they defined it, or their use of the ID provider may be so simple that the only thing they are providing is the SSO feature. The LoginHub opens up the options for MC to literally 1000's of ID providers and lets you manage your users and security from the ID side.
These settings provide you with a lot of the value that LoginHub brings to MC and your Identity provider.
Footnotes
-
1: For the role claim, you can pass multiple of this claim. We don't restrict how many, but the browsers do in terms of cookie size limits, and they change the limit from time to time (in 2020 they changed the max DOWN for 'security' reasons.) As a result, we officially support TWO roles being passed, any more than that may require support services and may not be possible. We do offer some regex based filtering so that if you pass us a large number of roles, we can, before it goes in the cookie, trim the list down, such as saying conceptually "only pass on the roles that start with MC_". If you have a provider that gives you the ability to trim it down to just the one or two roles that might apply to the user, then we strongly recommend you do it at this point rather than at the later point with the regex. ↩