Maintenance Connection Everywhere (MCe) · EAM/CMMS manuals
First steps, getting set up
Set it up to work with your computer (most commonly a cell phone)
First you need to get the device working with your computer – be that a cell phone or tablet or desktop or laptop or …
In general, the manufacturer will have one or more apps that you set up to receive photos.
Then, again in general, you will turn your thermal camera on, and plug it into your computer (cell phone etc..,)
You will then use their app to take the pictures and set all your rules. Things like:
- Do you want a fixed range for the color (so white is always 133C for example) or do you want it to float where, for example, white is the current hot spot?
- Do you want visual images overlaid?
- Setting the mapping of the visual to heat, so they align properly
Then you will want to learn all the features that matter for your use case
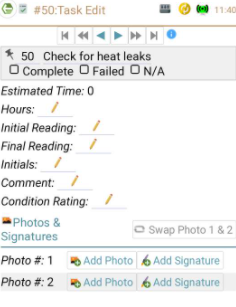
Next you will want to import your pictures into MCe.
You will want to choose Add photo, in this case I'm using task photos:
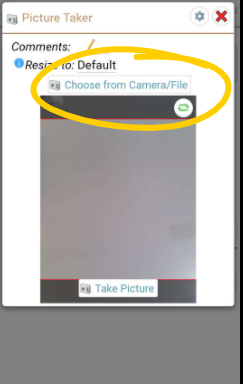
From the picture taker you will pick Choose from Camera/File:
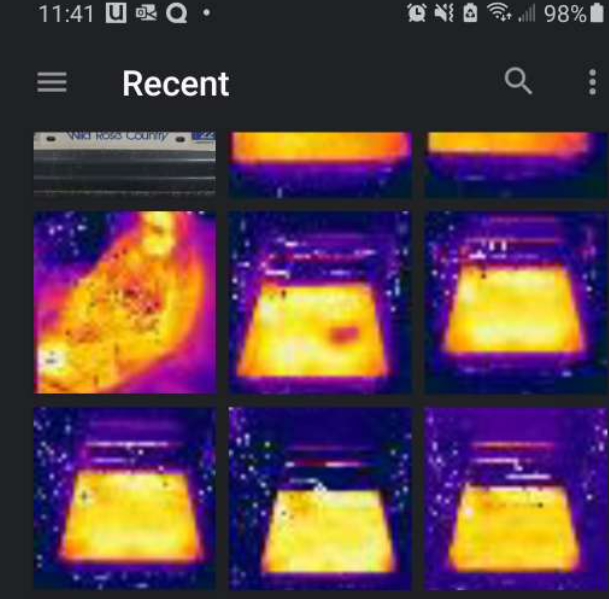
Then from there, sadly, every device varies and if you can't find them easily, you'll need to check both your thermal camera manual and/or your device settings/manual to find where the images are. In my case, the images where, by default, on Android, with FLIR, under Internal Storage, DCIM, FLIROne.
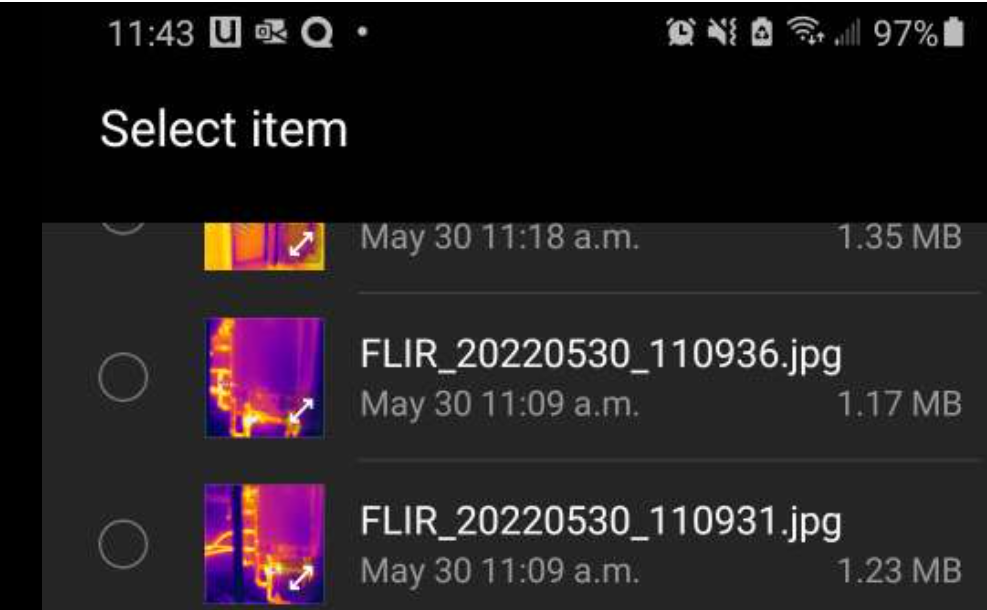
But depending on your device, you may find them under Recent, as I did with mine as well:
Some tricks:
As you are walking to where you want to take your thermal image, remember that they take 20 to 60 seconds to warm up (depending on the manufacturer and the level of absolute accuracy you want) … so turn it on before you get to where you are taking the picture, let it warm up while you are on your way.
If you are always reading the same type of devices and there is a temperature range that indicates a problem – see if your software lets you have a fixed range, so instead of having white be "the hottest currently" set white to be "there is a problem here"
If you need a larger/higher resolution image than your device supports – use its panorama mode. This lets you get a horizontally or vertically larger image, essentially giving you a higher res image than a single shot would give you.
You normally won't want to use video, but on occasion, video or time lapse video can be a good way to show a problem by showing how it changes over time. You can then upload that as an attachment instead of as a photo.
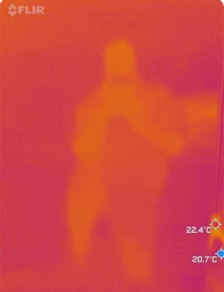
Watch for shiny surfaces and shoot at an angle so you don't get reflected infrared images. Here is a picture of me in front of a wall with glossy paint. I guess you could call it a Thermal Selfie.