

 Maintenance Connection Everywhere (MCe) · EAM/CMMS manuals
Preamble
This is the detailed install/upgrade guide for MC Everywhere, Maintenance Connection LoginHub and Maintenance Connection DataHub v10+. Post installation configuration is detailed in a separate document and that document will also need to be gone through in order to ensure a successful install or upgrade and may be required to take advantage of any new system level features that are enabled by this version.
The system configuration documents are found at:
- General: https://info.maintenanceconnection.ca/pdfviewer/39f2ab4b-c903-4fa5-9a9f-4d40012c60f8
- LoginHub: https://info.maintenanceconnection.ca/pdfviewer/139e6c85-ae0e-4f65-b549-6bf9ba218511
HTTPS Reminder
As of January 2017 we officially stopped supporting HTTP due to browser features being removed from HTTP. More details are available here: https://info.maintenanceconnection.ca/pdfviewer/1ecd86f1-4f7c-4df0-90a6-da3b5592d2de
As of October 2021 the only major feature that works "ok" (not recommended) without HTTPS is Active Directory login. This is not expected to remain functional as modern browser do keep forcing features to HTTPS, so it is not considered "supported" since it being functional is a feature (or lack) of the client browser and not the software package itself.
Reboot Reminder
TL;DR: The install may require up to 2 reboots.
The install process needs certain requisites that may require a reboot. The installer performs a pre-install check for pending reboots and may require a reboot in the middle.
If 'now' would not be a good time to reboot you will want to schedule this upgrade for later.
It is important in the 'Standard" way that you give our technicians access in a way that they can reconnect to the server after it reboots. To minimize issues here - you need to make sure there are no pending reboots before our technician starts to do their work.
Which Install or Upgrade Process?
The install process and upgrade process is very similar for most steps. For reliability and ease of rollback upgrades are mostly a special case of install with a few 1 time server configuration steps skipped. This allows an upgrade to often be reversable quickly and easily.
Installs or Upgrades have 2 normal process options. Documented in this document is an additional "everything done manually" option which is NOT an available support option and will require extra cost professional support services, but is provided for review and troubleshooting purposes.
Standard (Easy) Install or Upgrade Method
Tell support you want MCe to be installed or upgraded, you meet the prerequisites and they schedule a time and click a few buttons, and the upgrade will happen. If you give sufficient access, there will be no charge for this service.
The cost for this method are included in your annual support and maintenance agreement as long as you give appropriate access to the server. If you want to watch while it is done, there is an extra charge as it does allow our technicians to conveniently work on other things while 'waiting' for the server to do the various steps.
There is typically nothing else that needs to be done for the standard (Easy) install, you can now skip the rest of this document and go to configuring the system.
You can access the documentation from any MCe installation, before or after you are logged in.
Assuming one or both of MC and/or MCe are already running, the prerequisites are:
- You need to provide access for our technician to log into the server that IIS is on. For this process they do not require access to the server that SQL server is on, although some scripts will be run from the IIS server.
- You need to make sure you have your HTTPS certificate available and ready
- There needs to be no pending reboots on the server (such as other software updated)
If neither MC nor MCe are running yet, a completely new install/new server, then this is not the right starting document.
Manual Install or Upgrade Method
The screen shots and some of the steps below may get out of date as these are 'notes' for our experts and 'info' for our customers. Screen shots especially are likely to change.
This is more manual, and if you choose this way and need assistance from support (recommended) there will be billable professional service time involved.
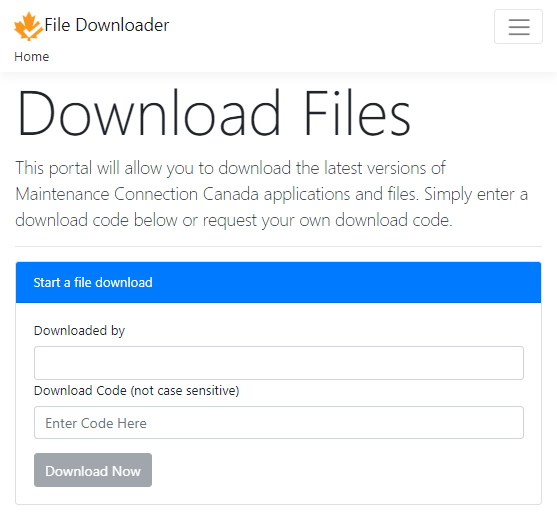
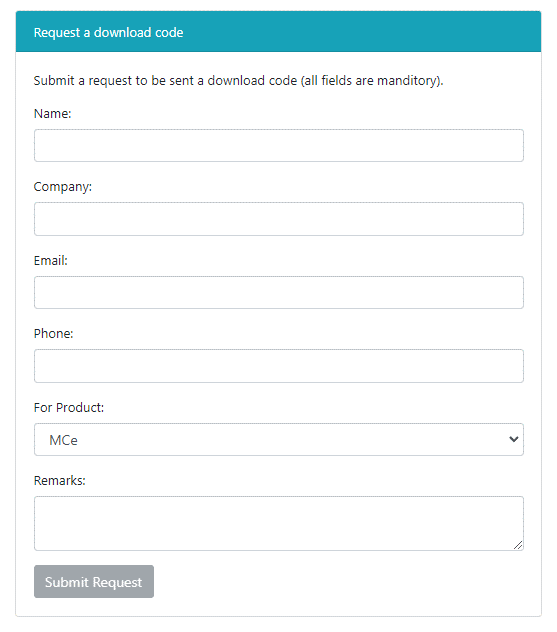
1. Download the MC Everywhere installer (same file for upgrades) from https://files.maintenanceconnection.ca. If you don't have a download code yet, make sure to ask support either directly or via the convenient form provided:
2. Run the installer, this will unpack into a new directory for each version (for convenience use the same directory in the installer, the installer creates a different sub-directory).
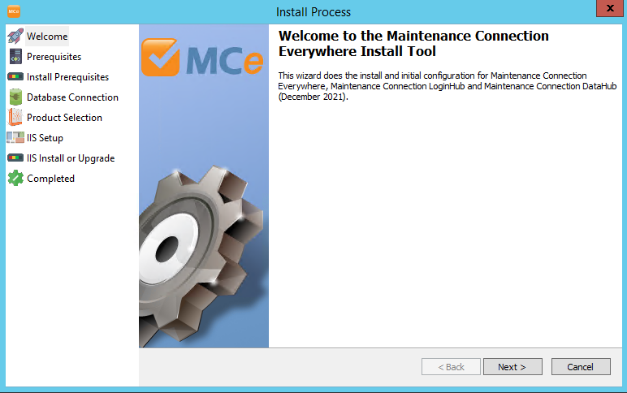
3. When the installer finishes it should automatically launch the post-installation wizard. If the post-installation wizard doesn't launch you will be able to find it in the installation directory /<version>/<preReq/>config.bat
4. The installation wizard will walk you through the process step by step ensuring that everything is ready for system setup. Click next.
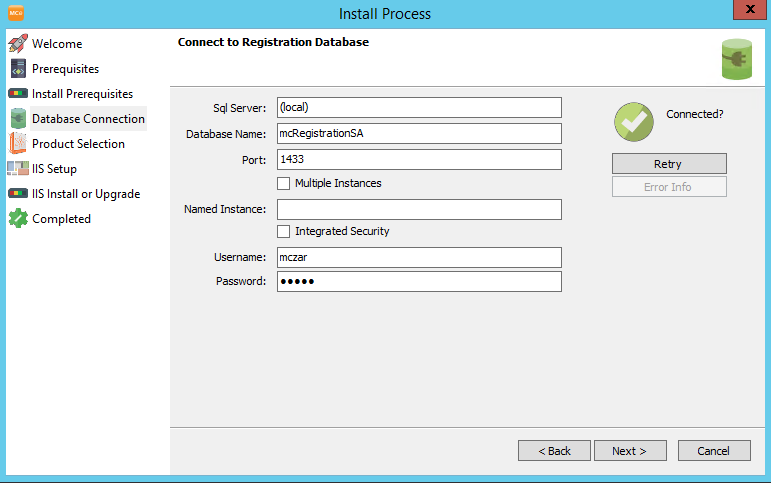
5. Database Connection. Enter the connection information in order for MC Everywhere to connect to the database. Pay special attention to "Integrated Security" since the user being used for setup and the user being used to run MC Everywhere are likely different. Once you have a working connection, click Next.
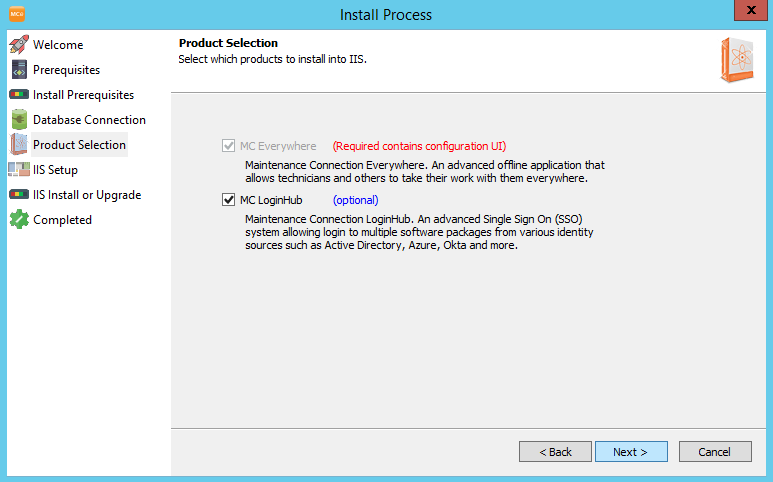
6. Product Selection. Select which product(s) need to be installed into IIS during the installation process. This will attempt to determine if old versions of these products are currently installed and select for you automatically. Ensure the correct products are selected and click Next.
7. IIS Setup. This is where you will setup how IIS will be configured. If previous versions of the software are detected this will attempt to pre-populate as many as the fields as possible. Make sure that the Server Access Url is correct for local access. This will be used during the setup in order to call into IIS and configure various MC Everywhere settings. If the URL is pointing to a load balancer, proxy or other system that is separate then parts of the configuration process will not be successful. If you have special naming conventions for Application Pools, this is where you should enter those adjusted names. Keep in mind that the Application Pools cannot be shared with other software packages ias that will cause the application to fail to load. Also ensure you have HTTPS (SSL) setup on the server.
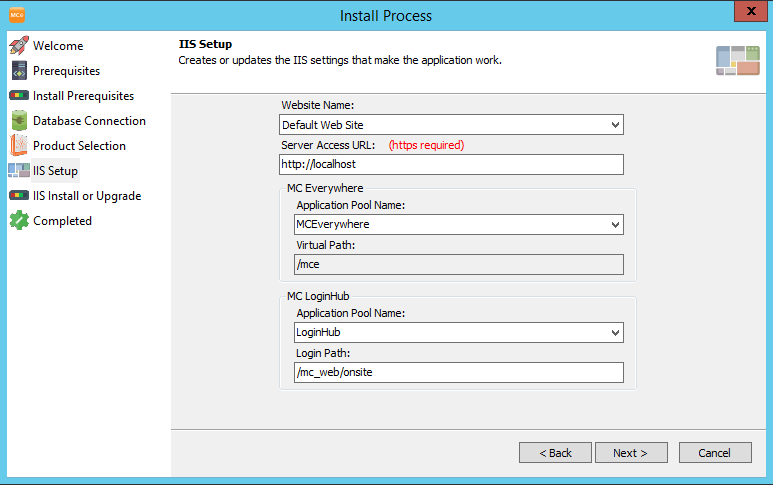
In this day and age, SSL is required, and the SSL must not be a self signed certificate. These are not our requirements per se, these are requirements that all modern browsers impose.
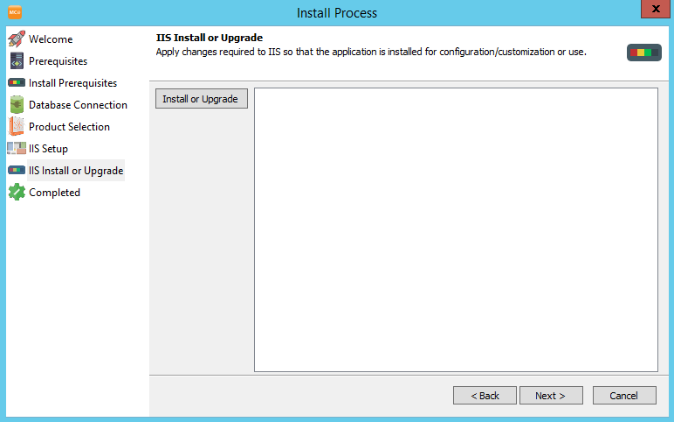
- IIS Install or Upgrade. Select the "Install or Upgrade" button in order to make changes to the system and install.
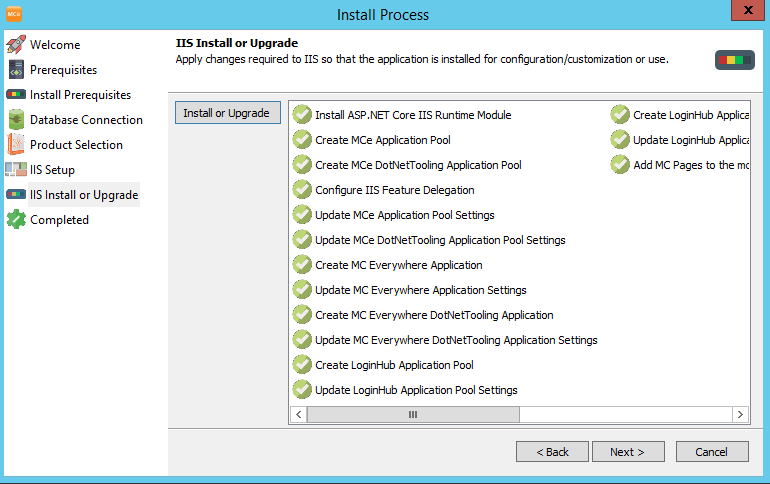
If errors occur during the process, you will be able to double click on the failed tasks in order to get a detailed error message to either fix the issue or report the issue to support for help fixing the problem. If you correct what is blocking an install step from working, you can re-run the install or upgrade as needed. When all the install steps have completed with green checkmarks, click Next.
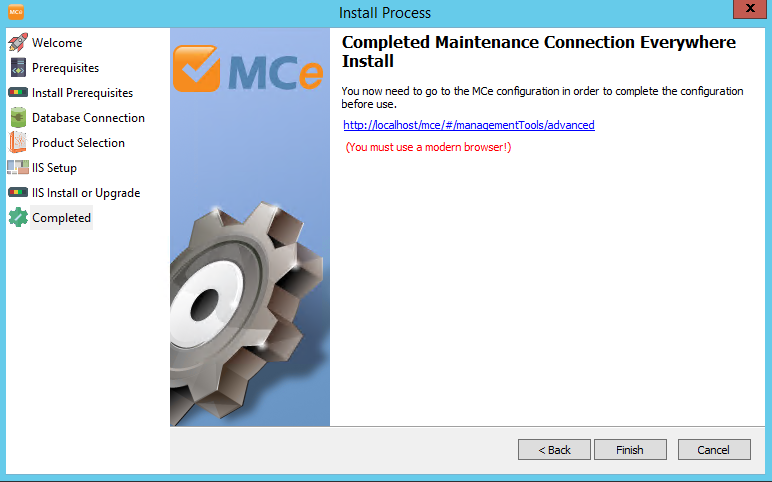
- Completed. The rest of the install or upgrade is configuring MC Everywhere (and other products if selected) in order to ensure they work correctly.
Advanced Installation / Troubleshooting
This documents the installation steps that are automatically performed by the "IIS Install or Upgrade" step. This documentation is not regularly tested and may gloss over minor portions of these steps on the assumption that anyone reading them will be advanced and is actually looking at these steps in order to troubleshoot why a system is not quite working perfectly (rather than attempting to perform an entirely unadded installation).
Create/Update MCe Application Pool
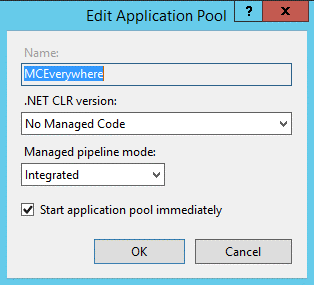
MC Everywhere needs an application pool setup for .NET Core use and dedicated to its own use (it will crash if sharing with any other application (including itself located at a different IIS path). The name of the application pool can be anything but "MCEverywhere" is recommended. The .NET CLR version needs to be set to "No Managed Code". In advanced settings for the application pool you must set:
- Enable 32-Bit Applications = False
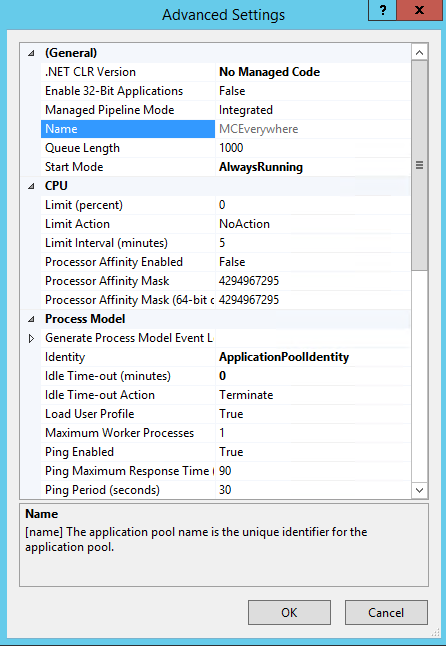
- Load User Profile = True
- (the next ones are recommended only)
- Start Mode = Always Running This will cause response time for sync, configuration and other requests to be faster at the cost of server memory.
- Idle Time-out (Minutes) = 0 This will cause the application to only unload 1 time per day. Faster response time at the cost of server memory. Set a shorter timeout if server memory is more limited.
Create/Update MCe DotNetTooling Application Pool
The MC Everywhere DotNetTooling module also requires an application pool. Like the other application pools this one cannot be shared. The name is recommended to be "MCEverywhere_DotNetTooling". The other settings are EXACTLY the same as for the MCe Application Pool.
Configure IIS Feature Delegation
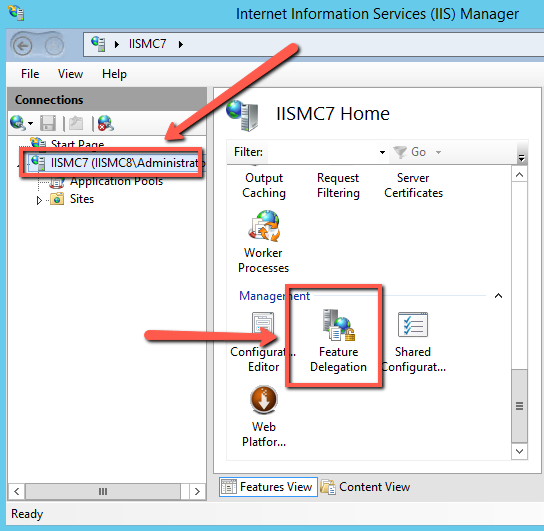
MC Everywhere needs to be able to log users in with SSO and other providers. In order to make configuration of these features as simple as possible, IIS needs to have some IIS Features with delegation enabled so that MC Everywhere can decide exactly which pages and when those features should be used. (This is not optional, if this step is skipped a 500 error or web.config error will be displayed instead of MC Everywhere loading).
1. Go to the Server node in IIS
2. Open Feature Delegation (bottom center option)
3. Select "Authentication – Windows" and change the option to Read/Write

4. Select "Authentication – Anonymous" and ensure the option is Read/Write (that is the default)
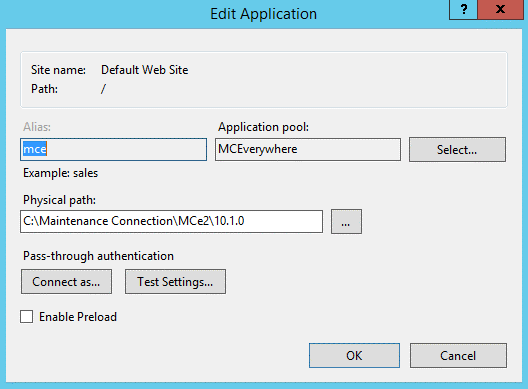
Create/Update MC Everywhere Application
MCEverywhere needs to actually be accessible. MC Everywhere should be installed in the same IIS website that Maintenance Connection folders such as /mc_web and /mc_imageserver are located. The IIS application directory must be called /mce or some links and other activities will end up broken.Since MC Everywhere installs in a new directory on every install or upgrade (the directory is: /<version/> from whatever your selected install path), the IIS application directories always need changing on each upgrade. Make sure to select the correct application pool.
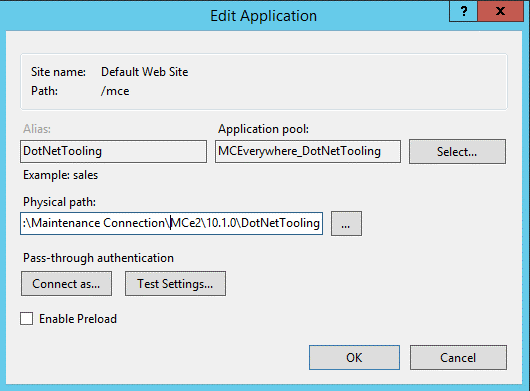
Create/Update MC Everywhere DotNetTooling Application
The MC Everywhere DotNetTooling sub-application needs to be made accessible at /mce/DotNetTooling this sub-application contains features of MC Everywhere that have a specific dependency on .NET Framework 4.8 instead of .NET Core. Since MC Everywhere installs in a new directory on every install or upgrade the directory that the sub-application must point to is /<version/>DotNetToolingMake sure to select the correct application pool.
Create/Update LoginHub Application Pool
The MC LoginHub module also requires an application pool. Like the other application pools this one cannot be shared. The name is recommended to be "LoginHub". The other settings are EXACTLY the same as for the MCe Application Pool.
Create/Update LoginHub Application
MC LoginHub needs to be made accessible. MC LoginHub needs to be installed in the same application path as /mc_web is. The targeted IIS directory is /mc_web/onsite/loginHub. This is required or login will fail for various services.Since MC Everywhere (and LoginHub) installs in a new directory on every install or upgrade the directory that the IIS application directory must point to is /<version/>\Yes the directory is exactly the same as for MC Everywhere, LoginHub does access detection to provide the correct functionality depending on how the application was called. The paths used for detection can be configured in the system configuration if required.Make sure to select the correct application pool.
Add MC Pages to the mc_iis folder
For easy and successful login to Maintenance Connection products (MC Everywhere, MC, MC Express, MC DataHub, etc) users need to know the correct login page. When LoginHub is used, that login page is slightly different than the defaults so replacement pages are provided in order to ensure a smooth transition without users having to update their bookmarks.Extract the zip file from /<version/>/preReq/mc_pages.zip into the mc_iis install folder (known as mc_web in IIS). This package includes several files located in the correct paths. At least 2 of the files contained in the zip will prompt to overwrite (you can cancel and backup the original files if desired).This package of files changes on occasion so should always been unpacked on each install of LoginHub. Upgrades to Maintenance Connection also typically overwrite the files in this zip folder, so this also needs to be redone on each upgrade of Maintenance Connection (regardless of how minor the version change ends up).
Create/Configure appsettings.json
MC Everywhere requires a local settings file in order to know how to connect to the database. Copy the appsettings.sample.json and name the copy appsettings.json. The sample file has the fields pre-filled and you will need to change any settings that are inaccurate for your system.