

 Maintenance Connection Everywhere (MCe) · EAM/CMMS manuals
Sync to Server
As MCe is an offline application, to push or pull anything recent to or from server you need to use the "Sync" facility of MCe application. When the sync button is blue, such as below, it means that there are no changes on your device that need to be saved to the server.
There are 2 general ways to sync, the results are the same. The first is the auto sync, this happens in the background, some things – such as your changes – are synced almost immediately, as soon as you have a connection. Other things, like changes by others of what you are working on (perhaps a WO) are synced to you every few minutes, other things are synchronized less often, typically every 90 minutes depending on settings your managers may have changed. (The exact icons in that top right section vary.)

When you click on blue or any color sync button, it tells you when it was synced last. If you recently logged in for the first time in this browser, it may tell you it has not finished (it is working on) the initial sync. It also gives you a button to force a manual sync to get any changes on the server that are ready to come to you.
Note: The very first time you log in on a device, we automatically do a sync for you, and until it is done, you'll see the message saying it has not finished the initial sync.
A yellow ! inset icon on the sync button tells you that something went wrong in the sync, typically a conflict between what you entered and what someone else entered, and you can see the issues by clicking on it.
How (and why) to create an Service Request/Work order
SR is service request. It is created to initiate service request and assigned to employees, labors, crafts including yourself (You can assign that SR or WO to yourself too). WO or SR is intended to be completed task in specific timeline. Some WOs have procedures to follow. You can attach assets, materials or parts to WO. If materials or parts are added then it also includes part costs, labor costs, material costs. Costs can be actual costs or estimated costs. User can attach images with WO and their signature too with WO.
There are many ways to create a new work order/service request.
There are automated ways including:
- Automations (PM, PdM and others: schedule, meter based, spec change, asset value change)
- Events and Actions (This could be an IoT device that has a value that warrants a repair ASAP, the even would be the IoT device, the action would be create a work order and maybe do other things too)
- SQL Scripts, though this would be very rare
- Another system, brought in though our API or DataHub
- A work order that, such as failed tasks, decides a new work order needs to be created
There are manual ways including:
From the service requester
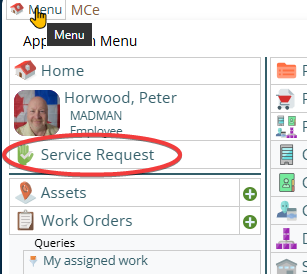
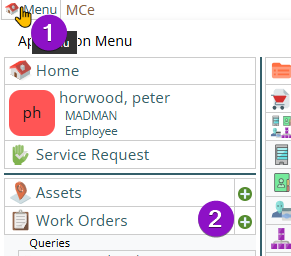
From almost anywhere, press the main menu (upper left) then press the green plus button beside Work Orders.
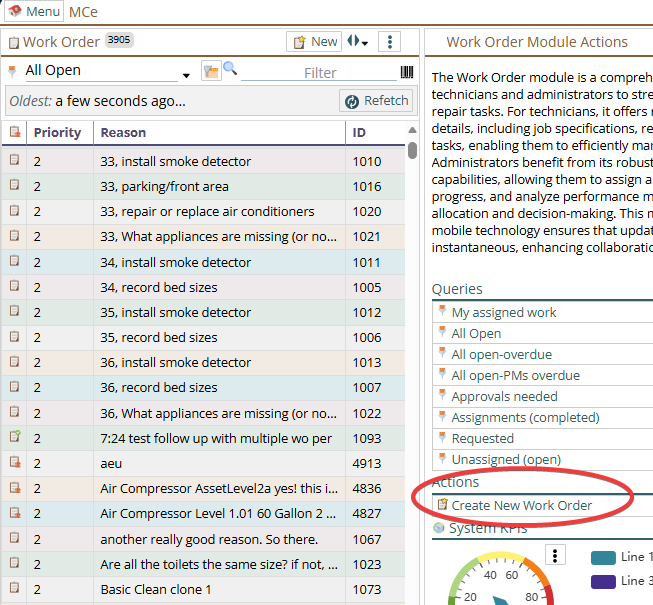
From within a WO module, Select "Create New Work Order" from the Action Panel.
From an asset, procedure etc.., (which will then use that asset or procedure)
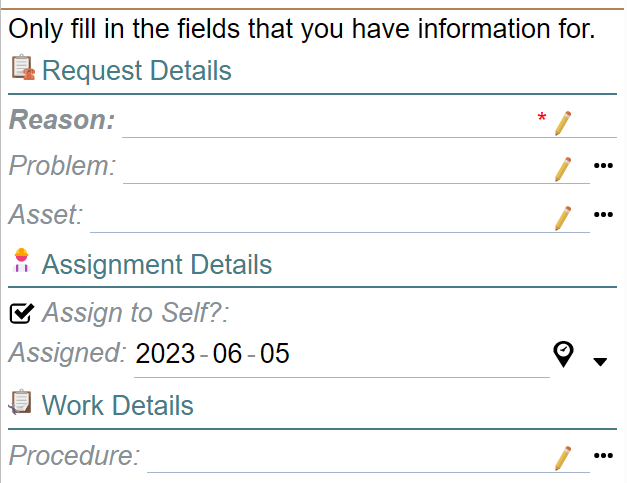
The specific fields to enter will vary from the screen above depending on which fields your administrators have decided should show up. There could be fewer or a lot more fields on the screen.
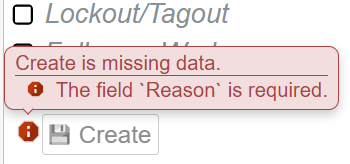
Fields whose labels are bolder – such as "Reason:" above are required fields. Your administrator may have chosen more to be required. Clicking on the red info button beside the Create button will tell you why the Create is being blocked.
Once the Create button is available to press
Press create button and WO will be created, and if the "Assign to Self?" is selected, it will be assigned to you. If your administrator has given you rights to assign WO/SR to different labor, you will be able to do so after you create the WO.
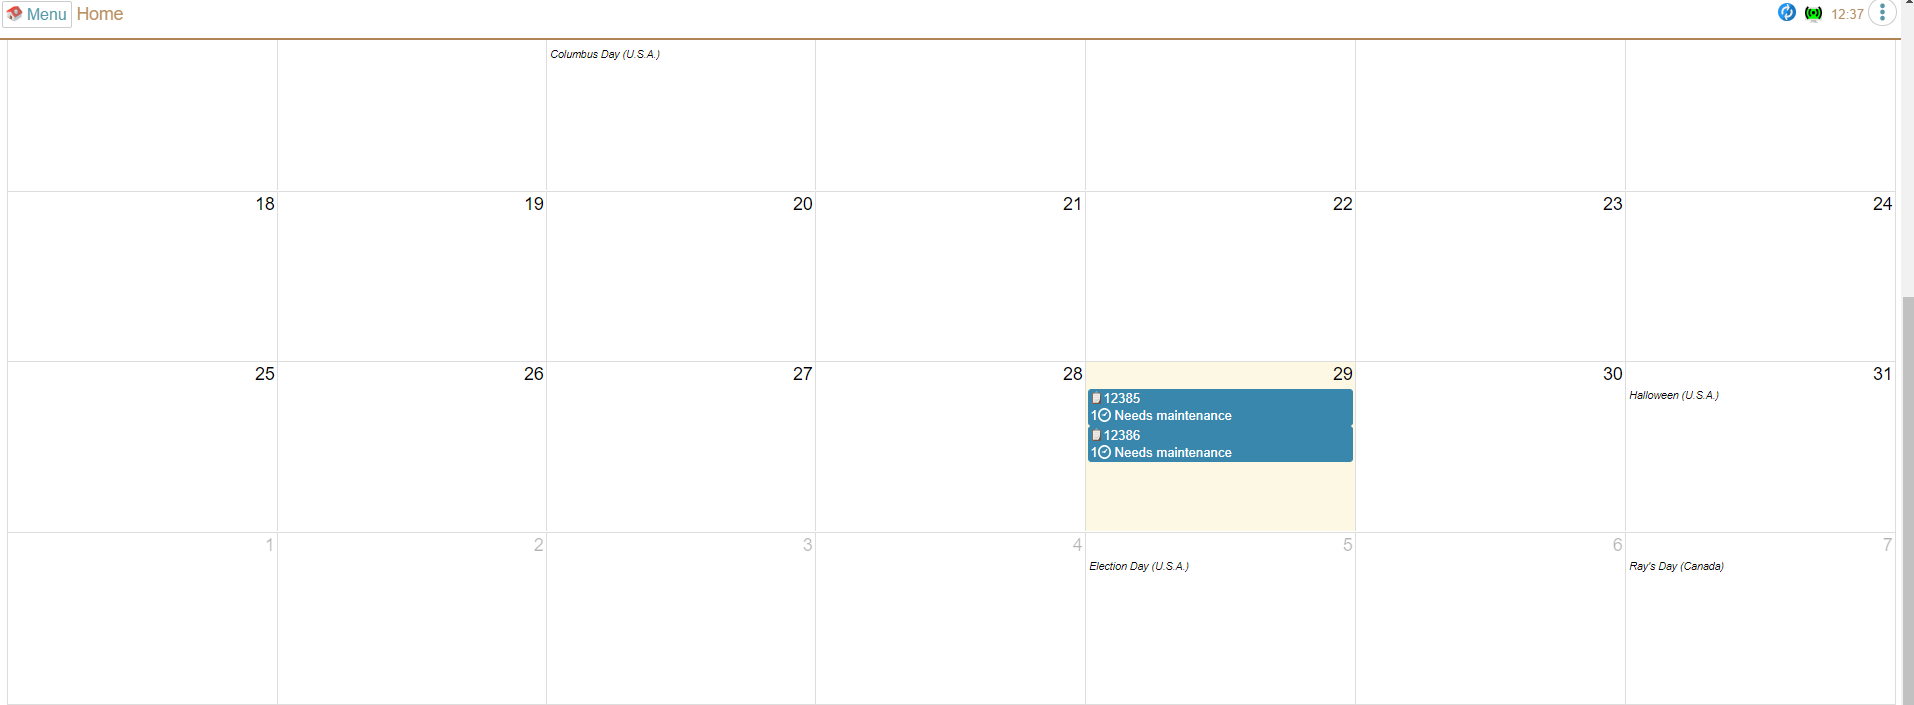
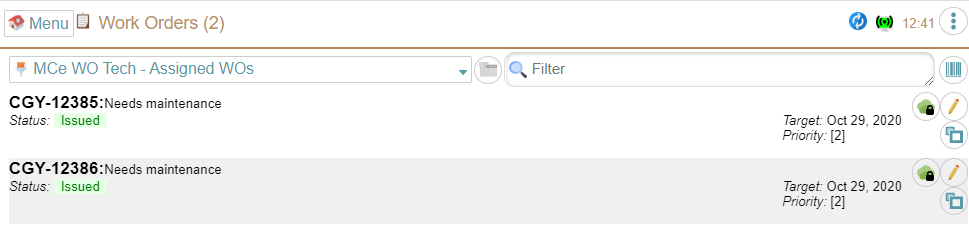
After the new WO has been synchronized, if you assigned it to yourself, your SRs will be seen on Home page calendar, e.g. in below screen WOs assigned on 29th Oct are shown in the 29th box, as well as in the WO module(s) in the list of your assigned WOs.
How to do simple editing of WO's
To edit WOs, you can select from the calendar or select a WO module1 from the left menu then press pencil button from WO list to edit the WO. You can also double click on any open areas on the WO list.
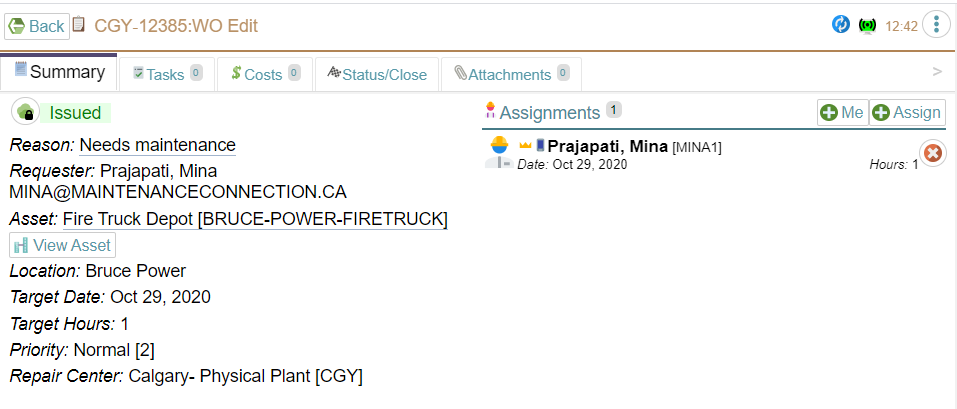
Since this is your first WO, it is worth mentioning a few things:
The specific fields and layout you see above can vary depending on changes your administrators have made to optimize the view. They can optimize it differently for different users based on factors like what repair center you are in, what access group you have or even optimize it specifically for you. For example, if you never use Target Hours, that field may not show up.
Our views will change, be optimized differently, depending on how wide your window is. Above shows a typical WO on a reasonably wide, such as might be found on a tablet in landscape mode, or a desktop computer. If you have a narrower space available on your desktop/laptop or commonly on a cell phone, the Assignments information will show up below the other fields, not beside it.
How to complete a WO
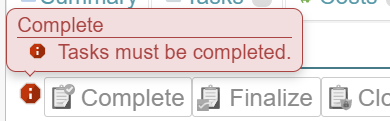
To complete or close the WO (if you have been given access to do that level, technicians are usually given complete ability, administrators are usually given finalize or close) select WO in edit mode.
Depending on settings by your administrators, you may have buttons to change status on the Summary tab (or anywhere they put them) to change status. A typical setup would be to only let you change the status to Responded on the Summary tab, and required you go into the Status/Close tab.
Beside the status buttons there may be a red info button. If so, clicking on it will tell you what is blocking you from changing status:
If the status buttons are not there, or you want to use the more full featured version of status change, select the Status/Close tab.
Pre 
On a narrower screen you may have to scroll the tabs left or right to choose the tab you want.
Press Change button from below screen to change the status of WO.
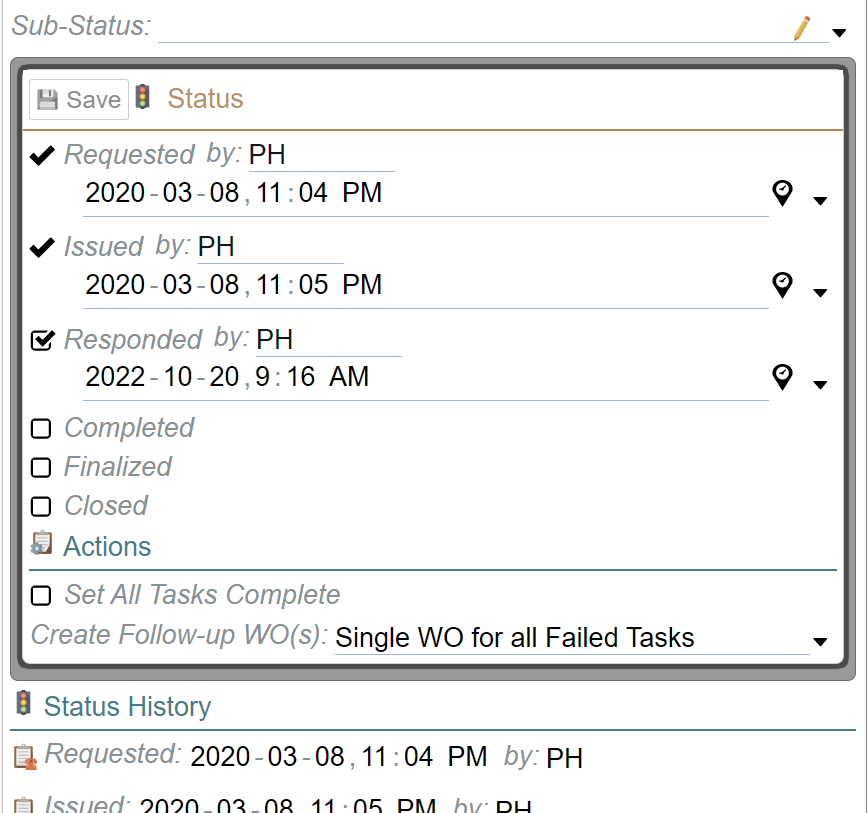
When you are happy with your changes, press the Save button. Note that, unlike most of your changes being saved automatically, NONE of the changes in the 'inline dialog' will be saved until you press the save button.
Expert tip: if there is a 'Save' or 'Create' button or a green checkmark/red X, your changes will not be saved and committed until you press that button. Otherwise – which is almost everywhere despite the examples in this document – changes are saved automatically. This document of course is trying to show you everything it can so it is purposely showing you all the different UX/UI (User eXperience/User Interfaces) you will encounter.
Technicians typically only go as far as clicking "Completed". Administrators usually will take it to Finalized and Closed. Depending on settings for you, you may or may not have access to all of these statuses. Technicians typically will be set up by their administrators to not have access to Finalized or Closed.
Sync your changes to Server, generally it happens automatically
As MCe an offline application, to push or pull anything recent to or from server you need to use "Sync" facility of MCe application.
As mentioned above, this happens automatically normally, but if you are about to shut down or if you are about to go offline for an extended period of time, you might want to run a manual sync to make sure everything is as up to date in both directions as possible.
Footnotes
-
1: There are more than one WO modules in the MCe family. Technicians typically only have access to one of them. Administrators however may have access to more than one, typically one that is optimized for doing administration work, and a second that is what your technicians use – optimized for performing a WO. ↩