Maintenance Connection Everywhere (MCe) · EAM/CMMS manuals
TL;DR (or a quick reminder)
In MCe, go to the main menu, Configuration, Access Manager, Licensing
Find the license you are interested in assigning to someone/group of people
Find an existing permission for the license (click on the blue circle with the + on the left) or add a permission (green circle with + on the right)
Add their access group or add the user
Save the permission
Do a second save at the top of the screen (this is an admin tool, it requires more save steps for safety)
Overview
The first time you use the Maintenance Connection Everywhere software, there is some 'fiddly' stuff you need to do to make sure everyone who needs access has it, and everyone who shouldn't have access doesn't.
If you haven't done one in MCe before, Please take the 10 to 20 minutes to go through this document, line by line, while setting up. It is written so you can safely start at the top and DO the steps while reading. If you want to read it completely first, that is OK too, but if you are in a hurry, please just read and do each step in the order it is in this document. If you really mess up (deny everyone including yourself access), your Maintenance Connection Everywhere support people will be able to fix you up … but you will be hugely inconvenienced for a day or two.
If this is your first time in to this area, use a large monitor. Once you are used to it, you can do changes on a narrow (phone for example) computer, but until you are comfortable, use a larger window on a laptop or desktop.
A license is something you purchase that gives you access to software.
There are 3 'steps' to working with licenses in MCe. These are all discussed in this document.
- You need to get the licenses you purchased installed.
- You need to specify WHO (individuals or groups) can use the licenses.
- You can restrict 'features' that your company, or individuals or groups of people in your company should not have/do not use.
And you can see who is currently consuming a license.
What type of licenses are there?
Named: This is purchased for a specific person and must only be used by that person. If periodically someone leaves the company or department and no longer needs it, then you can switch it to another person. We consider fair use to be switching one or two times a year. We do not consider fair use when you change names 'while on vacation' or 'for the shift' or 'for the weekend'. Having said that, currently we allow you to: once a license has been assigned for 21 days, you can re-assign it to someone else.
Named licenses are good for up to 2 devices '2 sessions', so for example your laptop and your cell phone. Having said that, currently we allow you, if you don't use a license for 72 hours, to automatically have another device obtain it.
Named licenses are NOT designed for shared devices, such as a bank of 5 computers that 70 people can use. For that, you should be using concurrent licenses. The sync time just doesn't make this practical to use a named license. We won't stop you of course, but your user experience will not be great and we have no intention of changing this design choice.
Concurrent: This is purchased to be used by 2 or more people, but only one person at a time. These are more expensive than a named license.
Enterprise aka 'Site': This is purchased for all the users at one location, maximum 100,000sq feet, the price is negotiated, but is obviously a lot more expensive than a concurrent license. The definition of 'one location' is 'one building', but if you have a special circumstance, we can negotiate a special meaning. Licenses are for specific modules or features, such as our WO Technician licenses. Named and Concurrent licenses will come with a count, such as "I have 5 named licenses" or "I have 32 concurrent licenses". Enterprise licenses for a product do not have a count, if you have multiple locations, you will purchase multiple enterprise licenses.
Token based are more or less 'usage' based and are used for our:
- DataHub
- API
- AI
"Token" based are outside the scope of this document.
There are special license types for some of our LoginHub family of products including identity provider connections and features like SSO
These are outside the scope of this document.
Installing a license
Installing licenses is normally done by your IT people or done on our SaaSs for you, but if you have been sent a .lic file to install, the instructions for installing it are covered in Appendix: Installing a .lic (License) file
Quick Startup:
When a system is set up 'normally' for you, at first EVERYONE can change 'who' can use licenses. You will normally want to restrict this first.
Once logged in to MCe, using the Main left-hand menu
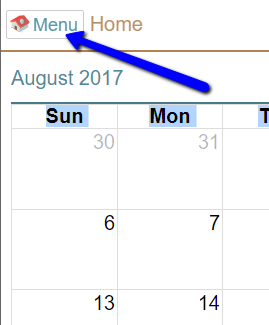
Go to the Configuration page from the Main menu. It's position will depend on various things including your window size. On larger windows it will be in the 2nd or 3rd column of the menu.
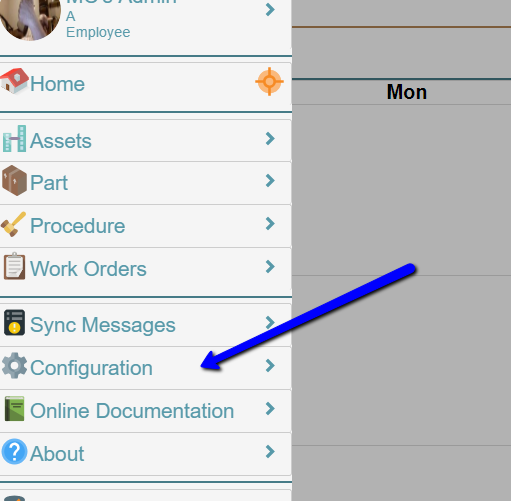
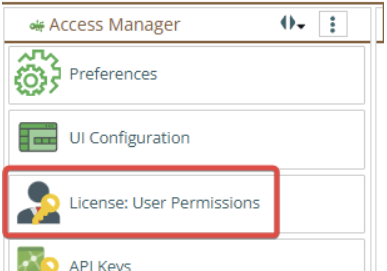
Then, on the Configuration page, choose Access Manager
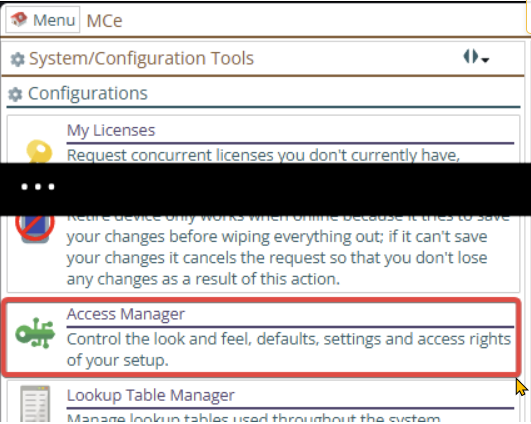
Then click on "License: User Permissions". Please note, while a lot of the MCe product line works in a completely OFFLINE mode, the License user permissions only works in either a good or at least a flakey internet connection, but it needs to be able to talk to the server. If you are fully offline, it is unable to do this.
This will take you to a screen that looks something like the following.
The specific license choices you see will vary depending on what products you have purchased.
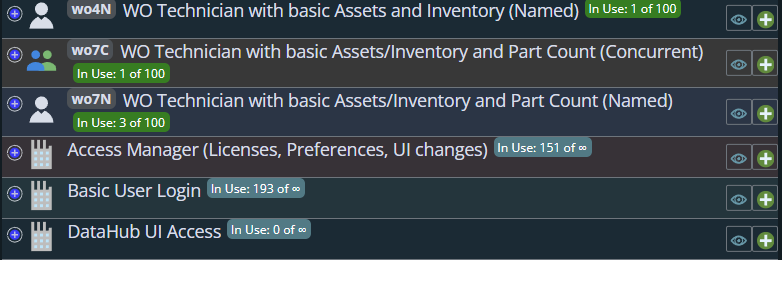
On the Left (or top if you have a narrow screen) you see the licenses you have purchased. There are 2 special ones that you get when you purchase any others, they are near the bottom of the image above'
Access manager - anyone you assign that licenses to controls the licenses. On initial setup, everyone has access to it. You should change it so that only system administrators have access to this license.
Basic User Login - you'll normally let everyone have access to this.
You should make sure you follow the next steps to make sure you have limited who can change License permissions for each license to only those people you want to be able to access the functionality.
You should NOT change the Access manager user License Permissions one until you have a few minutes of experience and you feel comfortable setting permissions.
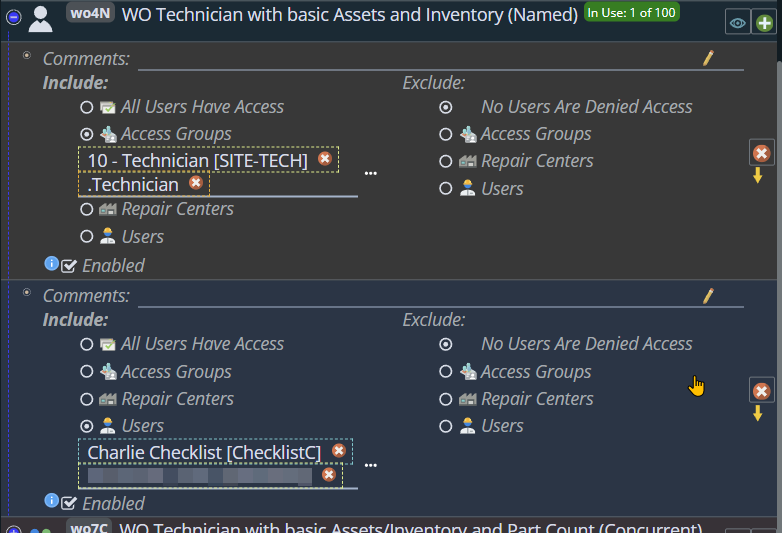
The first you will normally want to work on will be one named starting with WO, such as WO4N
Find one you have like this and press the + in the green circle on the right
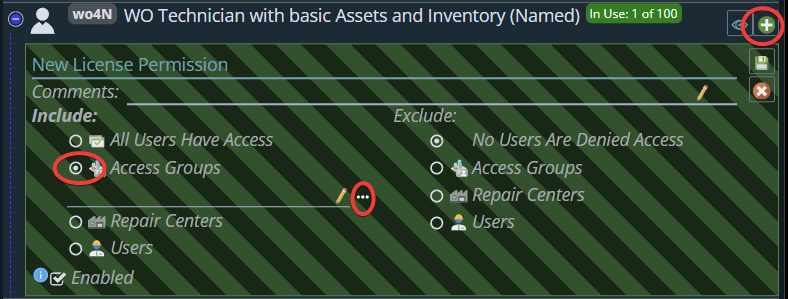
Then decide who you want to have access, in this case, and the most common case, will be to pick by Access Groups.
Some comments to help you understand this screen:
- If you are on a narrow window, the right-hand column will be BELOW the left-hand column. This is typical throughout our applications. (But as above, you shouldn't use a narrow screen until you are comfortable with it.)
- The comments are for you to use to remind you why you gave this (set) of people access to the license. If it is obvious, you can ignore it.
- On the left is all the users that you 'include'. On the right will be all the users, that would have been included, but you want excluded.
- The most common is to choosing one or more Access Groups, then pick a few select people from those access groups that should not have this set of permissions.
The two most common ways that are usually the best are to say 'everyone in this access group' or 'this specific person' can access it.
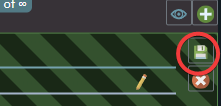
Once you are done with this permission rule, notice the green save button in the upper right area of the permissions.
You can add as many permission sets as you want, so you might add 2 access groups in one permission and some people in the other. That way everyone in each of those access groups can access this product, and the some people would also be able to use the license. If someone happens to be listed and they are also in one of the access groups, they don't take 2 licenses, they just have 2 ways they are approved to use the license.
Now let's set permissions for the "Access Manager" product.
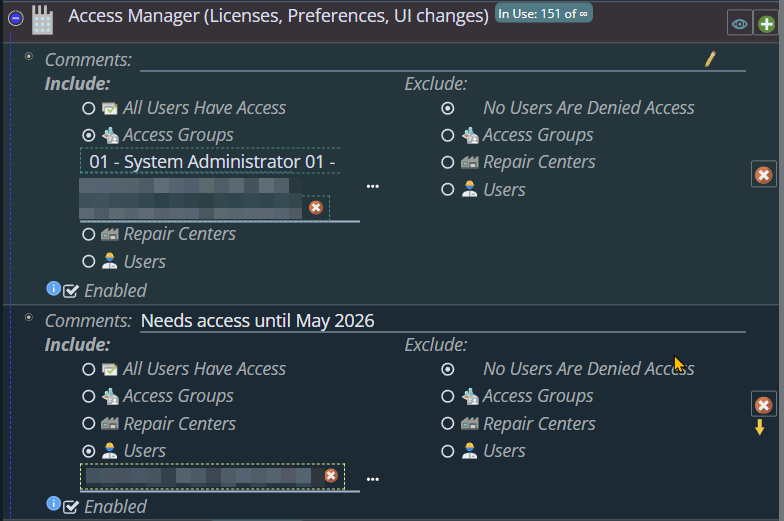
Assuming you are comfortable … it is now time to restrict who can use the Access Manager features.
Please note that you need to be very careful changing this one. This is the one that decides WHO can change License Permissions in the future. You normally will want to make sure that you leave at least three people who have access to it. For the rest of this discussion, we will assume that YOU are one of the people who should have access to setting and changing permissions.
This is key: You want to yourself permission BEFORE you take away permission for 'everybody'.
VERY IMPORTANT, as above, DO NOT DELETE THE 'EVERY USER IN THE SYSTEM CAN ACCESS THIS LICENSE' line until you have given yourself and/or someone else access to this license. Otherwise, as soon as you delete it, you will lose access and it will require a support call at our standard support rates to get you set up again.
And again the warning: If you add only one access group, and you aren't in that Access group and you delete the 'Every user in the system' permission – then as soon as that is saved, you will lose the ability to edit the license permissions.
Once this done, in most Administrative functions there is a second save step. This is to protect you from making combination steps that could cause problems part way through. Imagine you were comfortable with this program, and you removed yourself planning to add your replacement right after ... but if we auto saved, you lose permission to add the next person. So at the top of a lot of admin screens there is an extra step, extra save button.

More info, the details skipped in the quick start above.
- The Enabled checkbox lets you temporarily not let this group have permission.
- With concurrent licenses, there are 2 additional fields, "Default Expiration Minimum" and "Max Expiration Minutes". The minimum 10 says that if they are offline, they will continue to be able to use the license offline by at most 10 minutes. If they know they are going to be offline longer than that, they can set, because of the Maximum 120, to allow themselves to be offline for up to 2 hours (120 minutes)
-

Who has this license right now?
This question is answered by clicking on the 'eye' button.

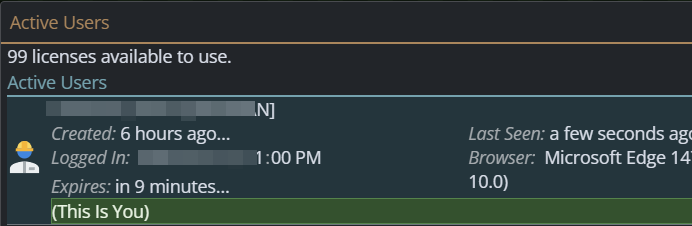
If a person is using the license on more than one device, they will show up multiple times in the list. If they are using a concurrent license, it will show when it is currently set to expire, but note that as they use the system that timeout will be extended based on the 'Min minutes' as above
Appendix: Installing a .lic (License) file
Normally support people will install your license files for you, but if you were emailed (or skyped or otherwise received) a license file, these are the instructions to install them.
Goto your server location and add /#/ManagementTools to the URL. So for example, if your test server has MCe installed here:
https://testServer.mccdemo.com/mce
You would type in:
https://testServer.mccdemo.com/mce/#/ManagementTools
Note: If you are running MCe, from the login page or from the Main left hand menu, you can click on the MCe logo to go to Management tools.
Note: If you do NOT run this from the server, you will be asked for an authentication code which you would have had to set up previously.
The URL should take you to this page:
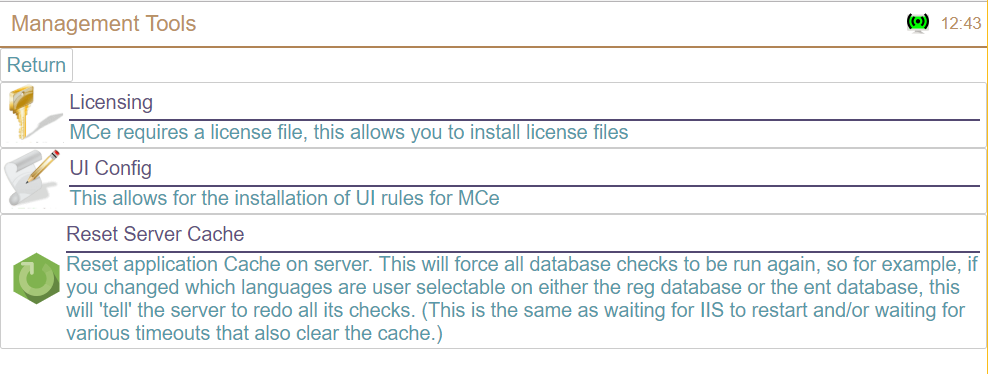
then click on Licensing
https://testServer.mccdemo.com/mce/#/ManagementTools/license
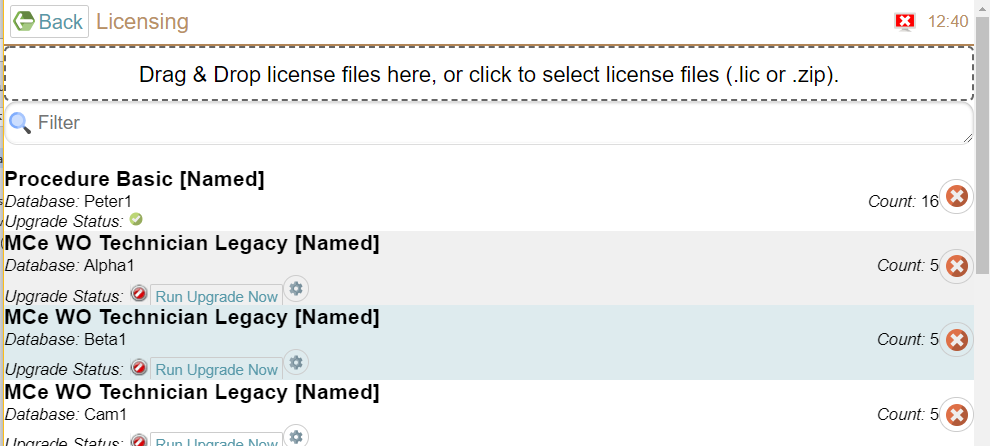
If you have no licenses, it will look like this:
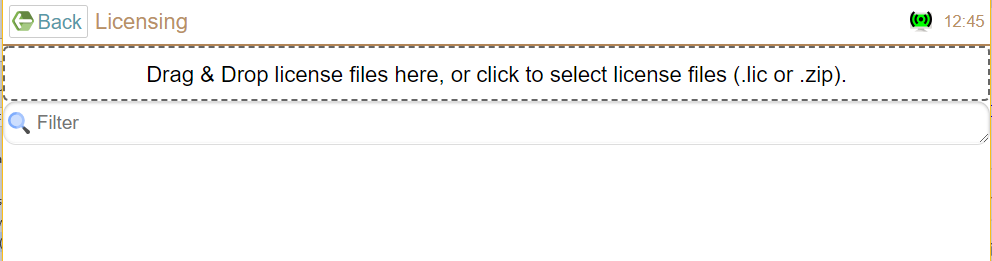
To install a license, you drag & drop it to the box indicated (notice the dashed outline) or click on it to 'browse' your computer to find the license file.
Once you have licenses installed, it will look something like this:
The bold text is the name of the license you have.
Each license is installed for a specific database (So Peter1, Alpha1, Beta1 below.)
Each Named or Concurrent license will have a count on the right side.
And then there is an upgrade status. If it is not green, you should click on the Run Upgrade Now before trying to log in.