

 Maintenance Connection Everywhere (MCe) · EAM/CMMS manuals
Purpose
This document explains how to manually run a DataHub Connector to import data into the system and verify the imported records.
Prerequisites
Before running the connector, ensure the following requirements are met.
Ensure Connector is Active
You can use inactive connector only to run validation. But to import the data the Connector must be active.


Who can build DataHub connectors and active them
Depending on what your IT and admin team decide, the people who activate DataHub connectors may or may not be the same people that build the connectors. Someone with Access Manager rights is required to activate them.
How to get to the License manager
The Access manager requires that you have rights to the "Access Manager" license. YOU decide what permissions it needs, not us, that is discussed elsewhere.) The Access Manager is on the Configuration page
Start by opening the main menu
Start by clicking on the main menu button on the left panel, top left portion.
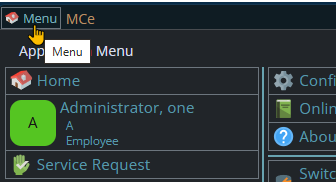
If the menu button isn't visible, you are likely on a screen too narrow to see everything, press on the left pointing gold button to take you so you can see the menu button.
Once the menu is up, the exact location of the configuration button depends on how wide your window is and how many options you have access to. On most it will be at the top of the 2nd or 3rd column of the menu but on a cell phone or narrow window, it will be down partway in the first column.
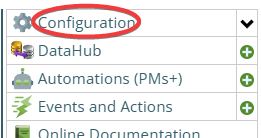
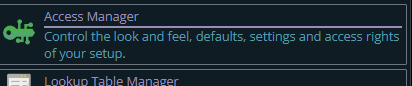
Then from there you choose the Access Manager, or what we call the funny green key
You can also click on the right hand V button in the main menu (if you don't already have it open), noting if you do it this way, you can directly pick the Access Manager tool that you want to go into.
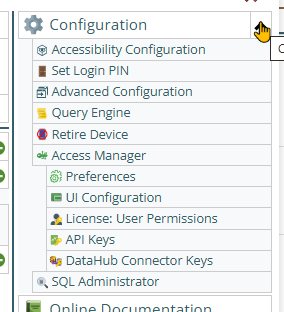
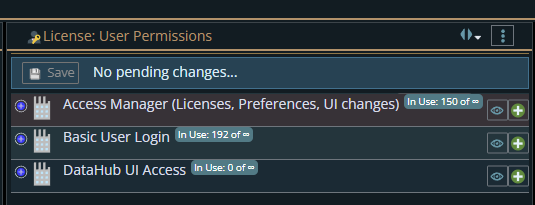
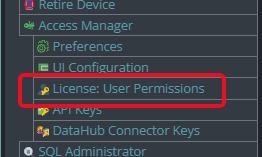
From there select the License User Permissions button
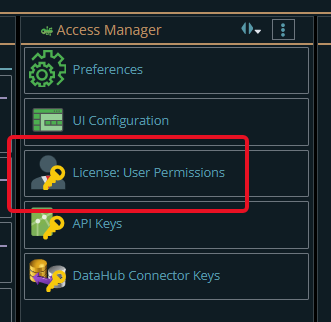
The top 2 licenses shown are needed to activate DataHub connectors (most systems allow 'everyone' for the Basic User Login. There is no limit as to how many can have any of these 3 licenses, but the Access Manager you will want to heavily restrict because it decides who can do what, and allows someone to allocate the licensed DataHub tokens between connectors. The DataHub UI restricts who can create DataHub connectors
Source File Availability
Prepare the source file containing the data to be imported.
The source file extension must match the reader configured in the connector Summary tab.
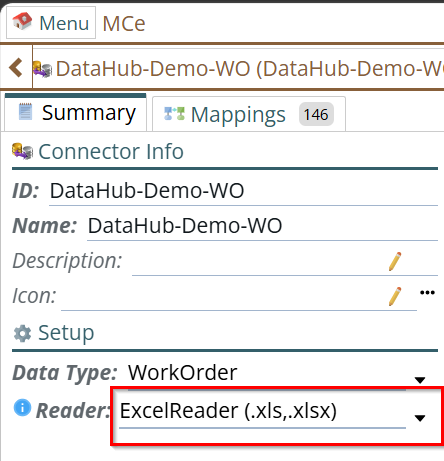 See which file format you should choose for more info
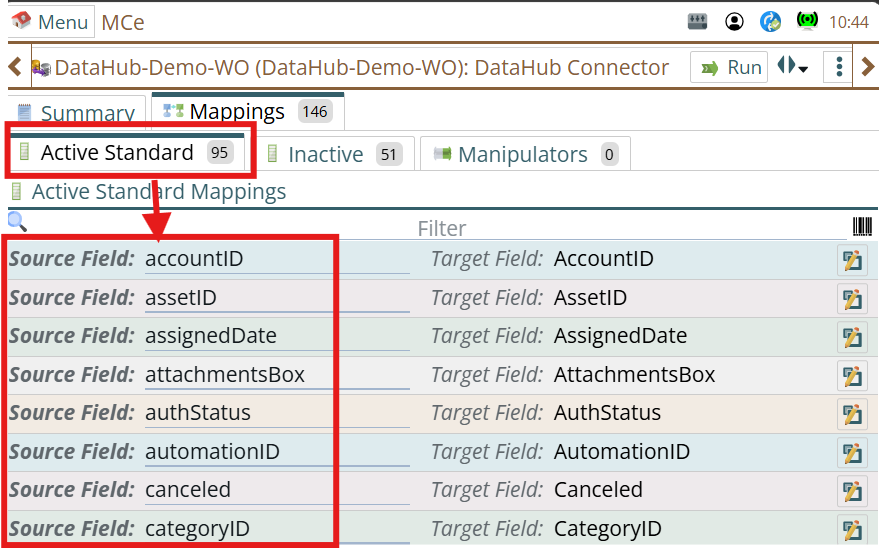
Verify Source Column Headers
Ensure that the column headers in the source file are on the 1st row and match the connector mapping configuration.
To be clear, it is REQUIRED that the 1st row be the one and only header row, all other rows must be data rows.
See also troubleshooting problems in data file for importingNavigate to:
Mappings Tab → Active Standard → Active Standard Mappings → Source Field
The source file headers must match the configured Source Field values.
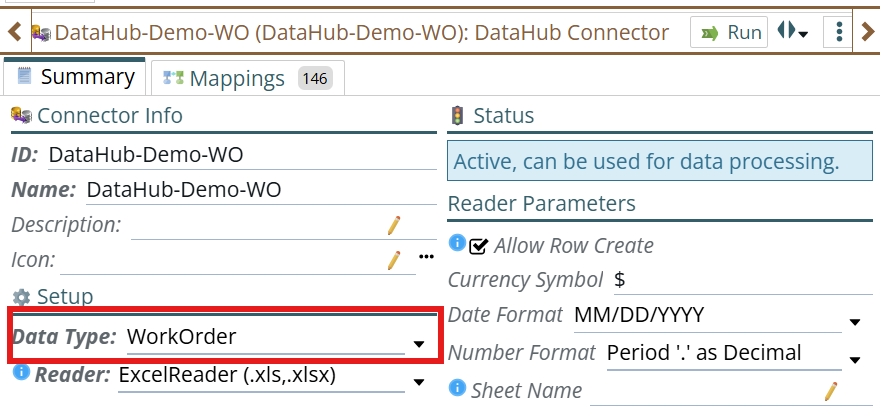
Verify Data Type Configuration
Open the connector Summary tab.
Confirm that the correct Data Type (Module/Table) is selected.
This determines where the imported data will be stored.
Examples may include:
- Asset
- Part
- WorkOrder
- Other configured modules
Incorrect Data Type configuration may result in importing data into an unintended location.
Running the Import
After all prerequisites are verified and the connector is active:
Step 1: Start the Import Process
- Open the connector.
- Locate the Run button at the top-right corner.
- Click Run.

A new window will open.
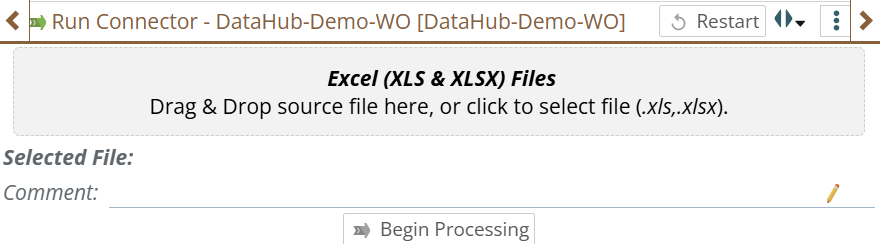
Step 2: Upload the Source File
Upload the import file by either:
- Dragging and dropping the file into the upload area
- Clicking the upload area and selecting the file manually
After successful upload:
- The uploaded file name will appear in the Selected File section
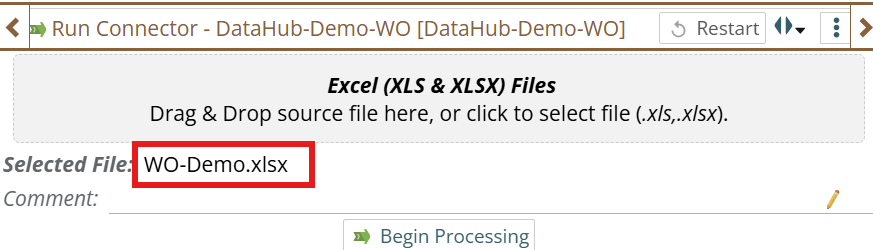
Step 3: Begin Validation
Click Begin Processing.
The connector will validate the source file before importing data.
Validation checks may include:
- Column mapping validation
- Required field checks
- Data structure validation
- Data existence check
- Data will be manipulated using manually defined or existing system's Converter/Validator/Mutator
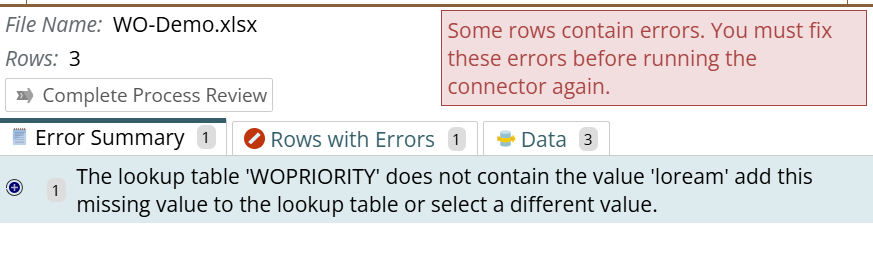
If validation errors are detected:
- Errors will be displayed
- Processing cannot continue until issues are corrected
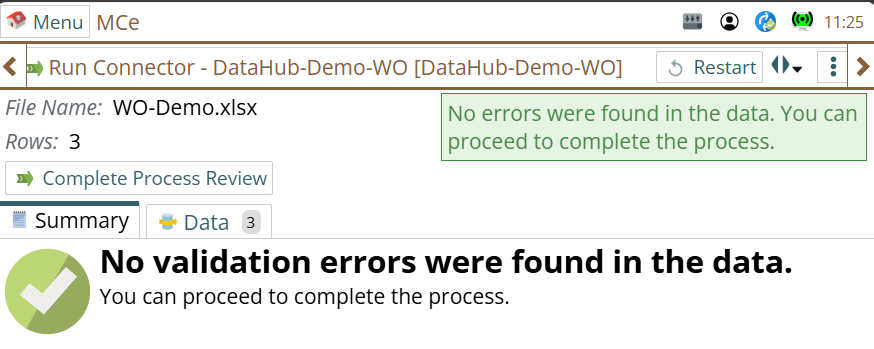
Following screenshots are to show how it looks like when successful and failed validation
On Success Validation:
On Validation Failed:
Step 4: Review Loaded and Validated Data
After validation completes:
- Open the Data tab.
- Review the loaded records.
Verify:
- Expected rows are present
- Values are mapped correctly
- No unexpected blank fields exist
Step 5: Complete Import
If validation is successful:
Click Complete Process Review.
The import process will begin.
Possible outcomes are:
Import Failed
If errors occur during import:
- Error messages will be displayed
- Failed rows should be reviewed and corrected
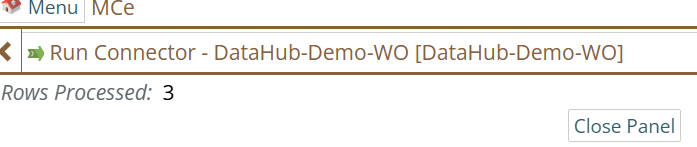
Import Successful
If processing completes successfully:
The system displays:
Successfully Imported <count> Rows
The imported records are now stored in the database.
Verify Imported Data
After import completes:
- Navigate to the module configured in the connector Data Type field.
- Verify that the imported records exist.
Check:
- Record count
- Field values
- Imported attributes
- Data relationships (if applicable)
Examples:
- Asset imports → Verify in Assets module
- Part imports → Verify in Parts module
- Work Order imports → Verify in Work Orders
Troubleshooting
Data Not Imported
Possible causes:
- Source file extension does not match configured Reader
- Source column names do not match mapping fields
- Required fields are missing
- Validation errors exist
- Import errors during processing
Additional Notes
- Connector must be Active before import execution.
- Validation occurs before database updates.
- Always verify mappings before uploading large files.
- Imported records should be validated after every import run.